How to Send Web Push Notifications: A Step-by-Step Guide
- September 27, 2025
- 8 mins read
- Listen
To connect with customers instantly with important updates is challenging for businesses. Emails often go unread, and SMS campaigns add extra costs.
Studies show that up to 80% of marketing emails go unopened. If your updates aren’t being seen, they can’t drive results.
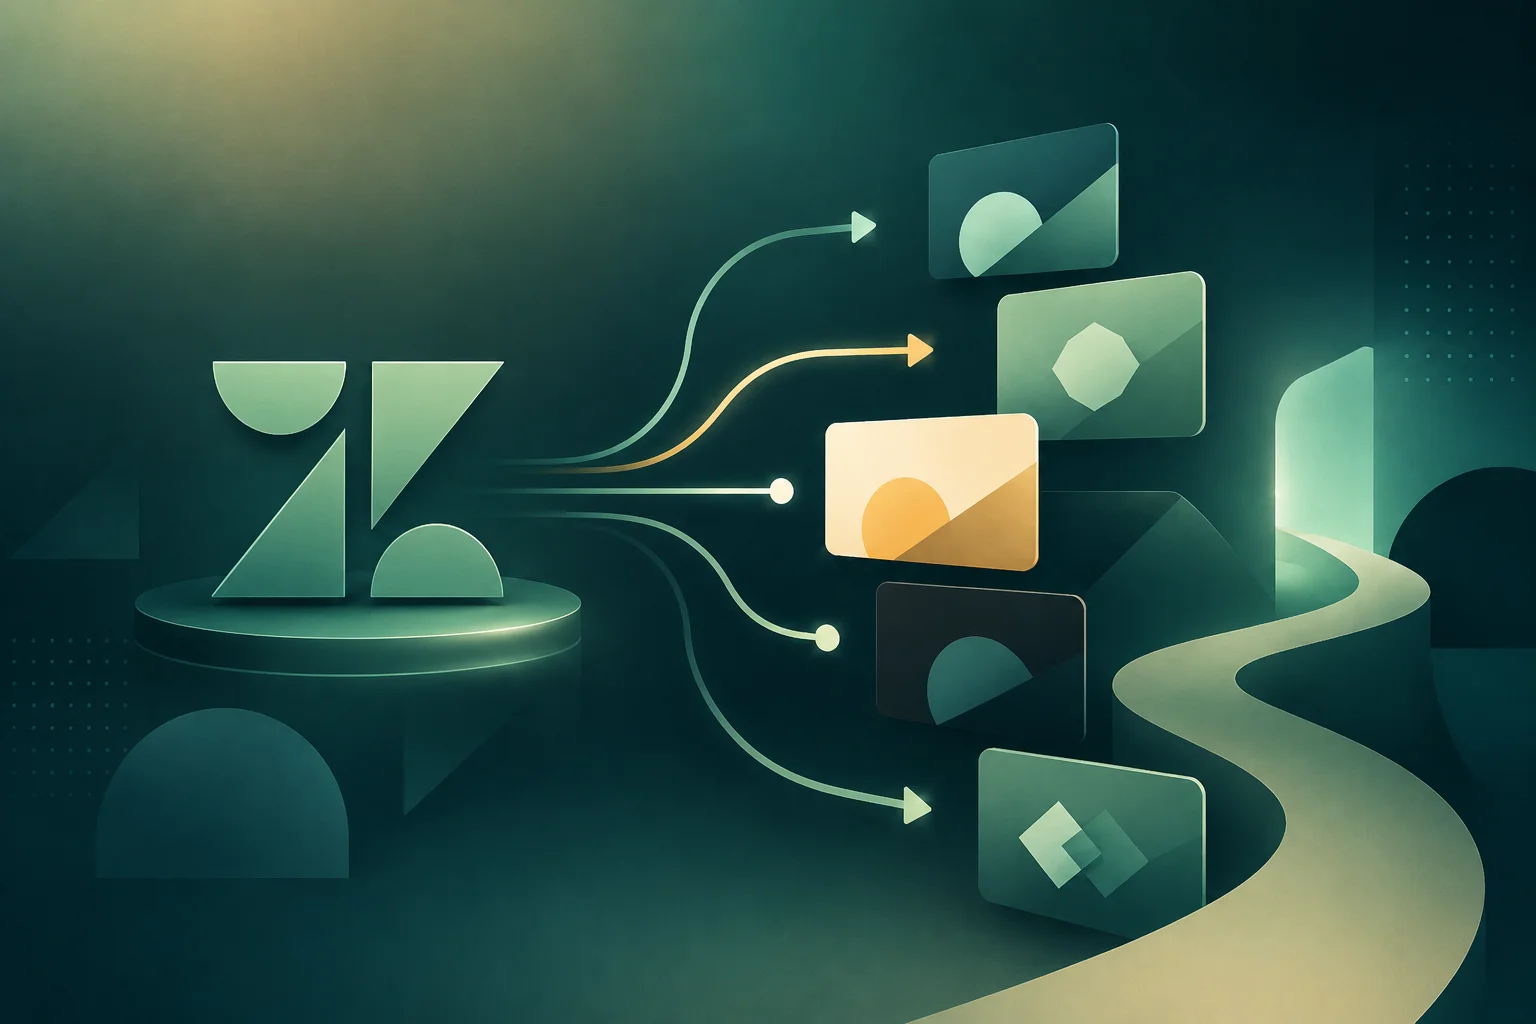
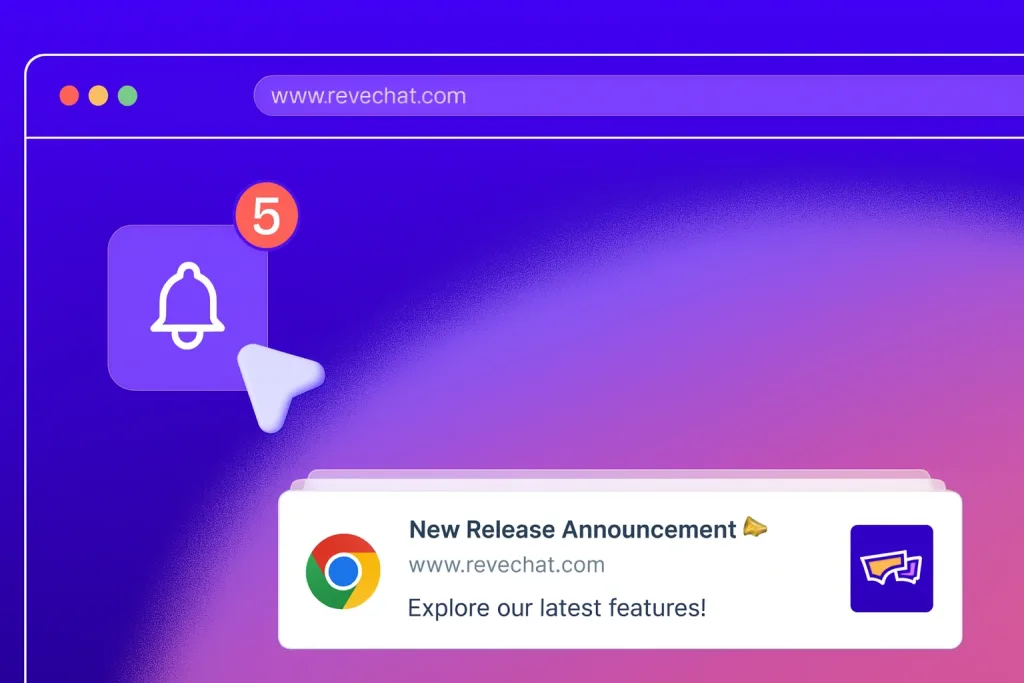
That’s why web push notifications have become a popular choice. They deliver messages straight to a user’s browser in real time. Even when they are not on your website.
In this article, we will show you a step-by-step guide on how to send web push notifications.
What are web push notifications?
Web push notifications are short, clickable messages sent directly to a user’s desktop or mobile browser. They appear in real time, even if the user is not currently on your website. Businesses can use them to share updates, announcements, or reminders instantly without relying on email or SMS.
What is so convenient about web push campaigns is the immediacy and visibility. In contrast to the emails that can go unread or social media posts that are lost in streams, push notifications appear right on the screen of the user and are hard to ignore. This allows businesses to notify their users at the right time, boosting engagement and response rates.
Why sending web push notifications is important
Sending web push notifications is important because they deliver real-time updates, boost engagement, improve customer retention, and drive higher ROI at minimal cost.
Higher engagement compared to email
Web push notifications often get significantly higher click-or reaction-rates than email. For example, one source finds that push can achieve 7× higher CTR than email on average.
Boosted daily active users and retention
Companies using web (and mobile) push notifications see measurable increases in user engagement: OneSignal data shows that messages sent via push increased sessions (daily active usage) by about 27%, and many businesses report retention improvements after implementing push strategies.
Growing adoption & volume
Push notification usage is rising fast: brands sent 55% more push notifications year over year, according to the Omnisend 2025 eCommerce Marketing Report.
Faster reaction times
Push notifications tend to produce responses much more quickly. One source says push notifications are opened almost immediately (or within an hour), which is far faster than many email campaigns where responses are delayed.
Cost-effectiveness and strong ROI
Because web push requires only browser permission (no SMS fees, no postal costs, lower deliverability friction than email spam issues), the return per effort can be high. Businesses report that push has as good or better ROI than email in many cases.
For example, OneSignal found that a large majority of companies using push said it had equal or greater ROI than email marketing or digital advertising.
How to send web push notifications (step-by-step)
In this section, we’ll walk you through the exact steps to send web push notifications using REVE Chat. From setting up your domain to creating and launching campaigns, everything you see here is based on the REVE Chat platform, so you can follow along easily.
Step 1: Sign up for REVE Chat
Start your journey by signing up for REVE Chat to access the platform’s full suite of features.
Once you’re registered, find the Settings icon on the left-hand menu, click it, and select Chat Widgets.
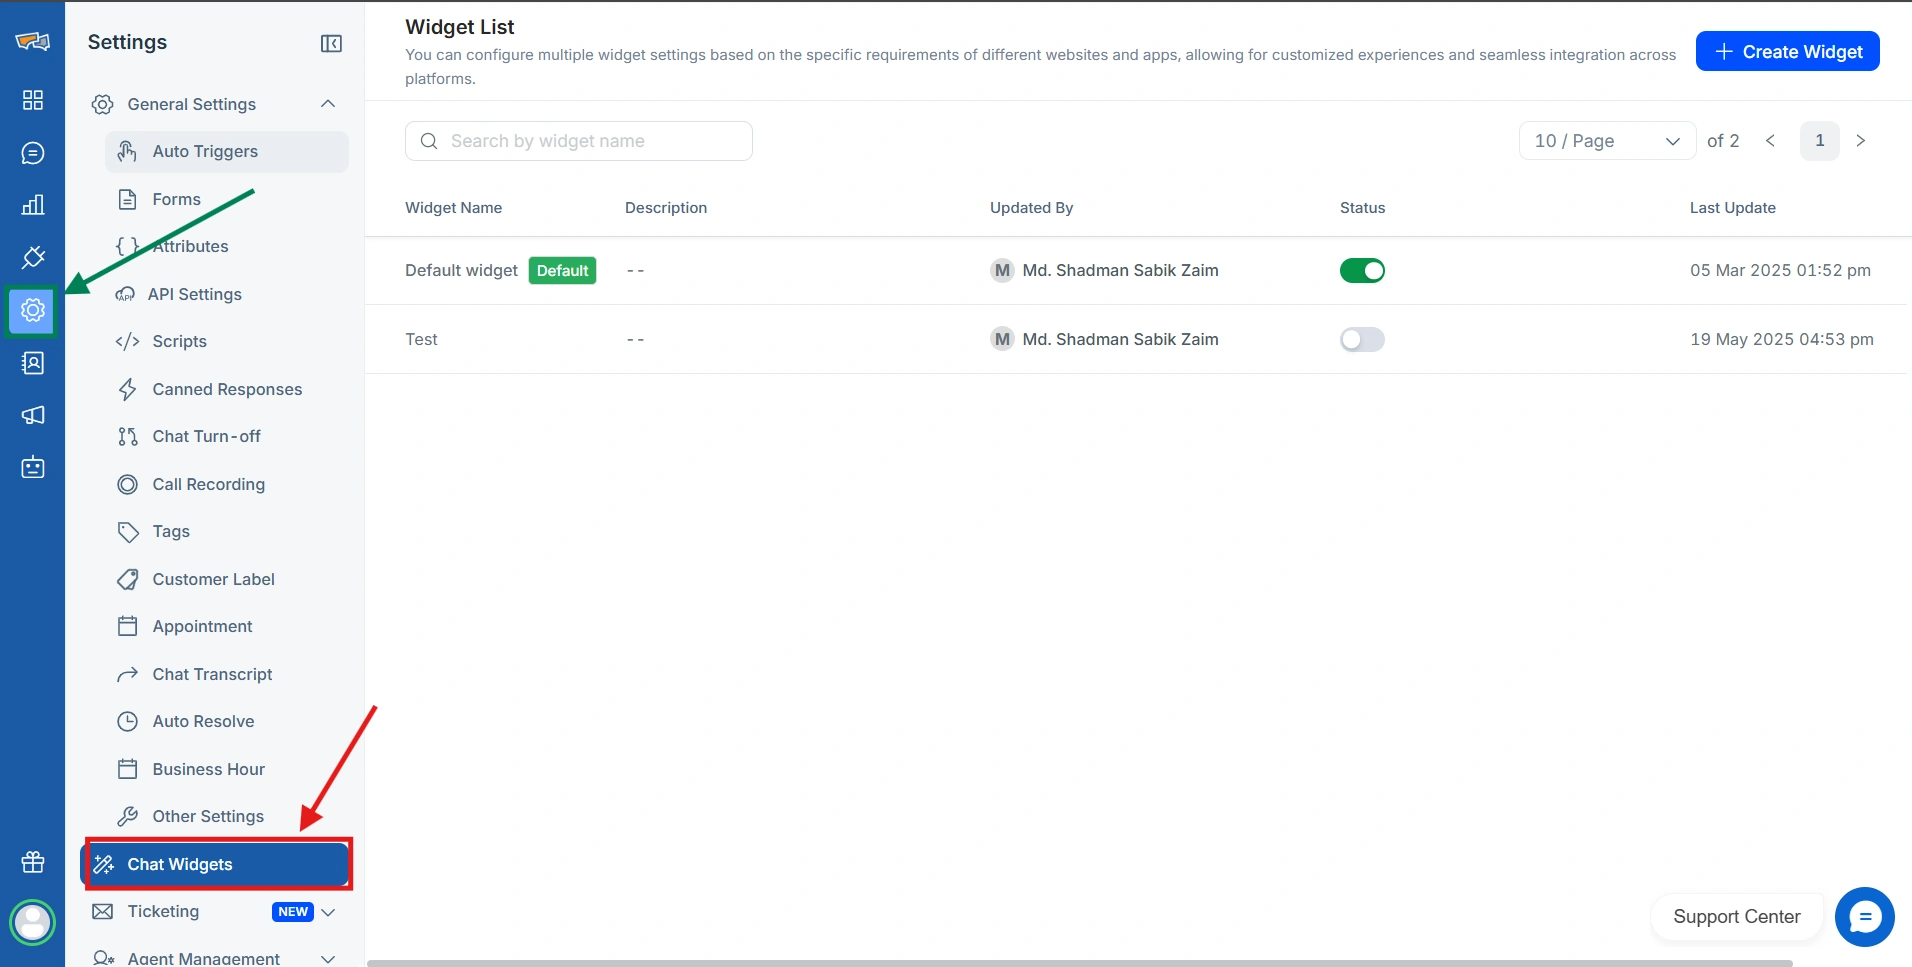
In the top-right corner, hit Create Widget to open a pop-up window or edit an existing Widget.
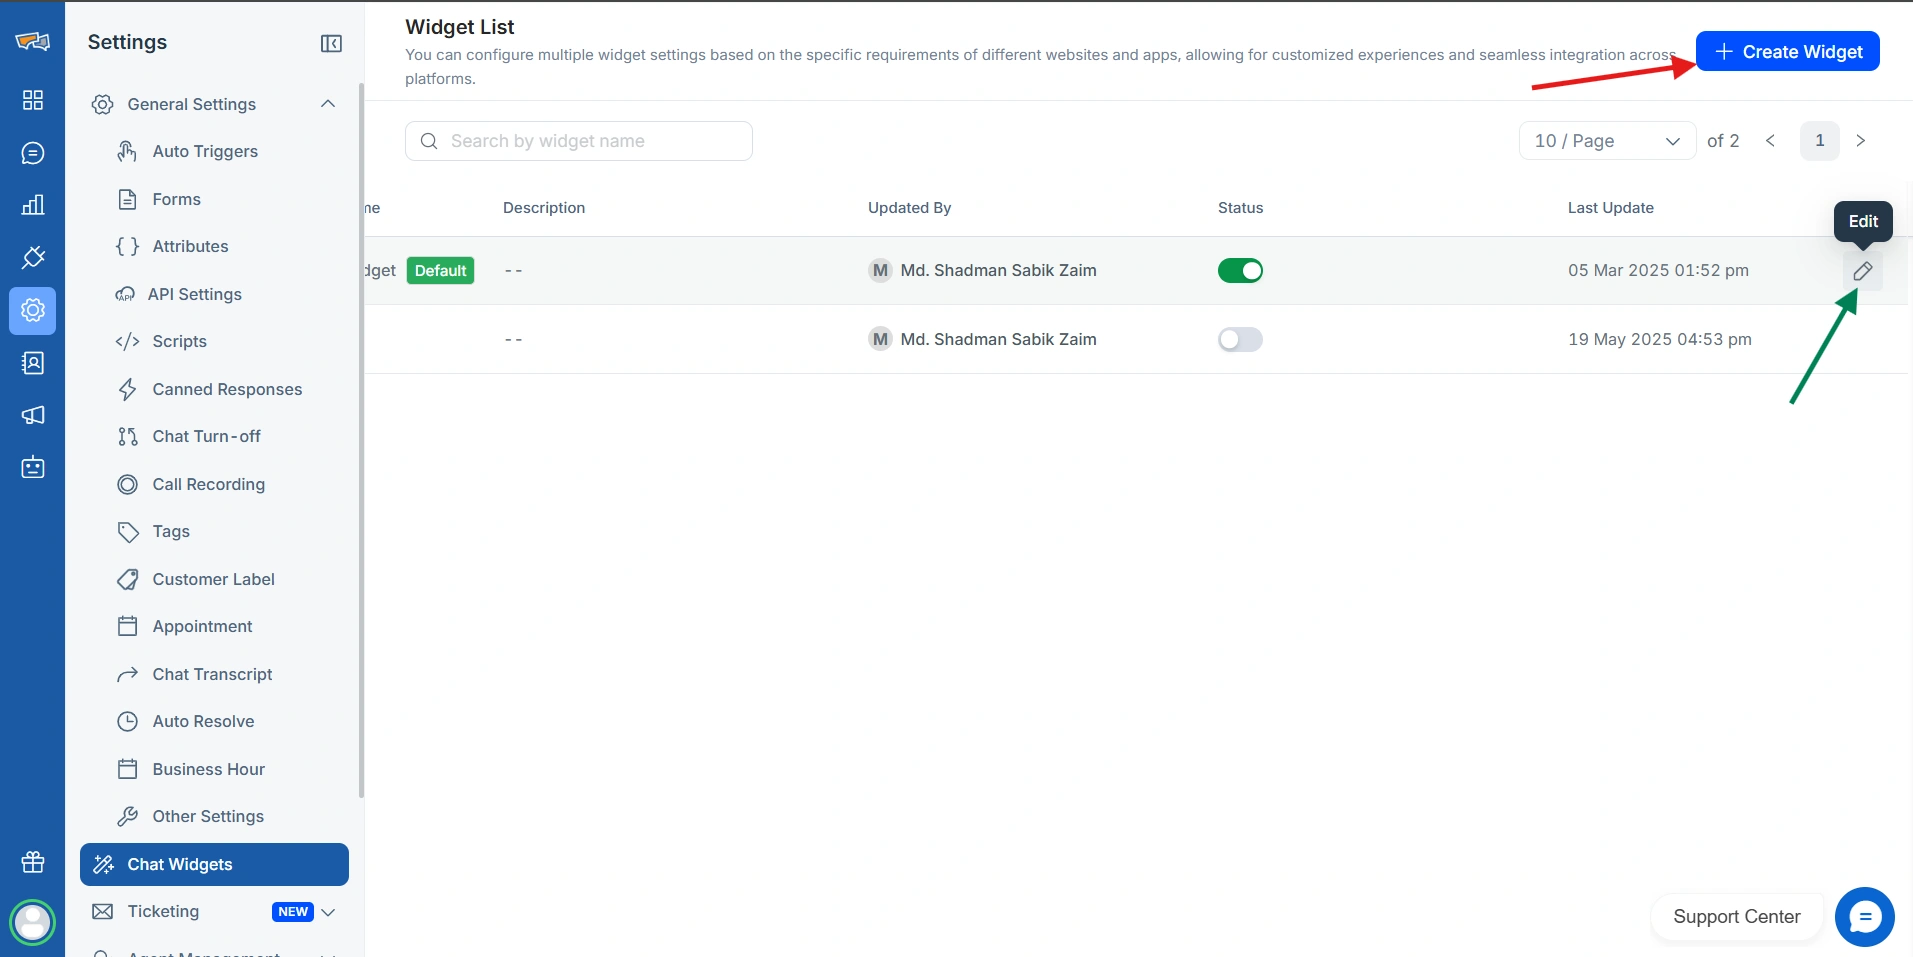
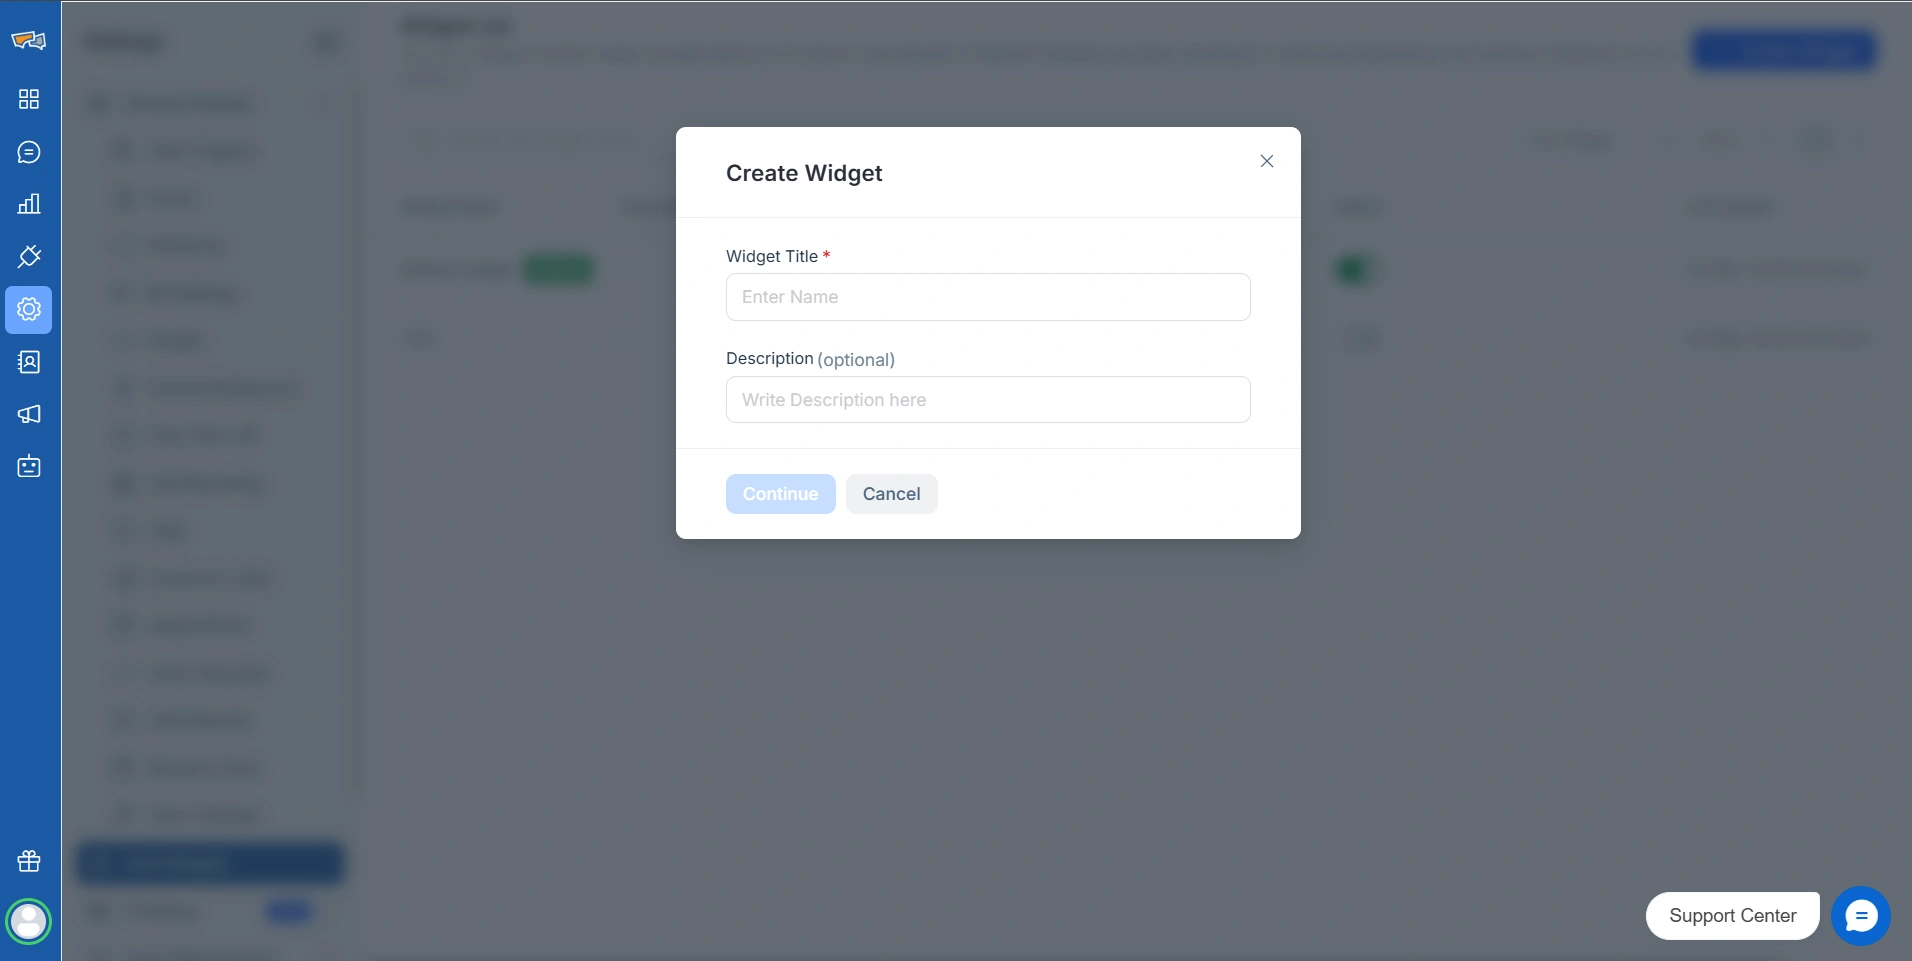
If you create a new widget, give your widget a catchy title and a short description, then click Continue to move forward effortlessly.
Step 2: Integrate widget and web push script
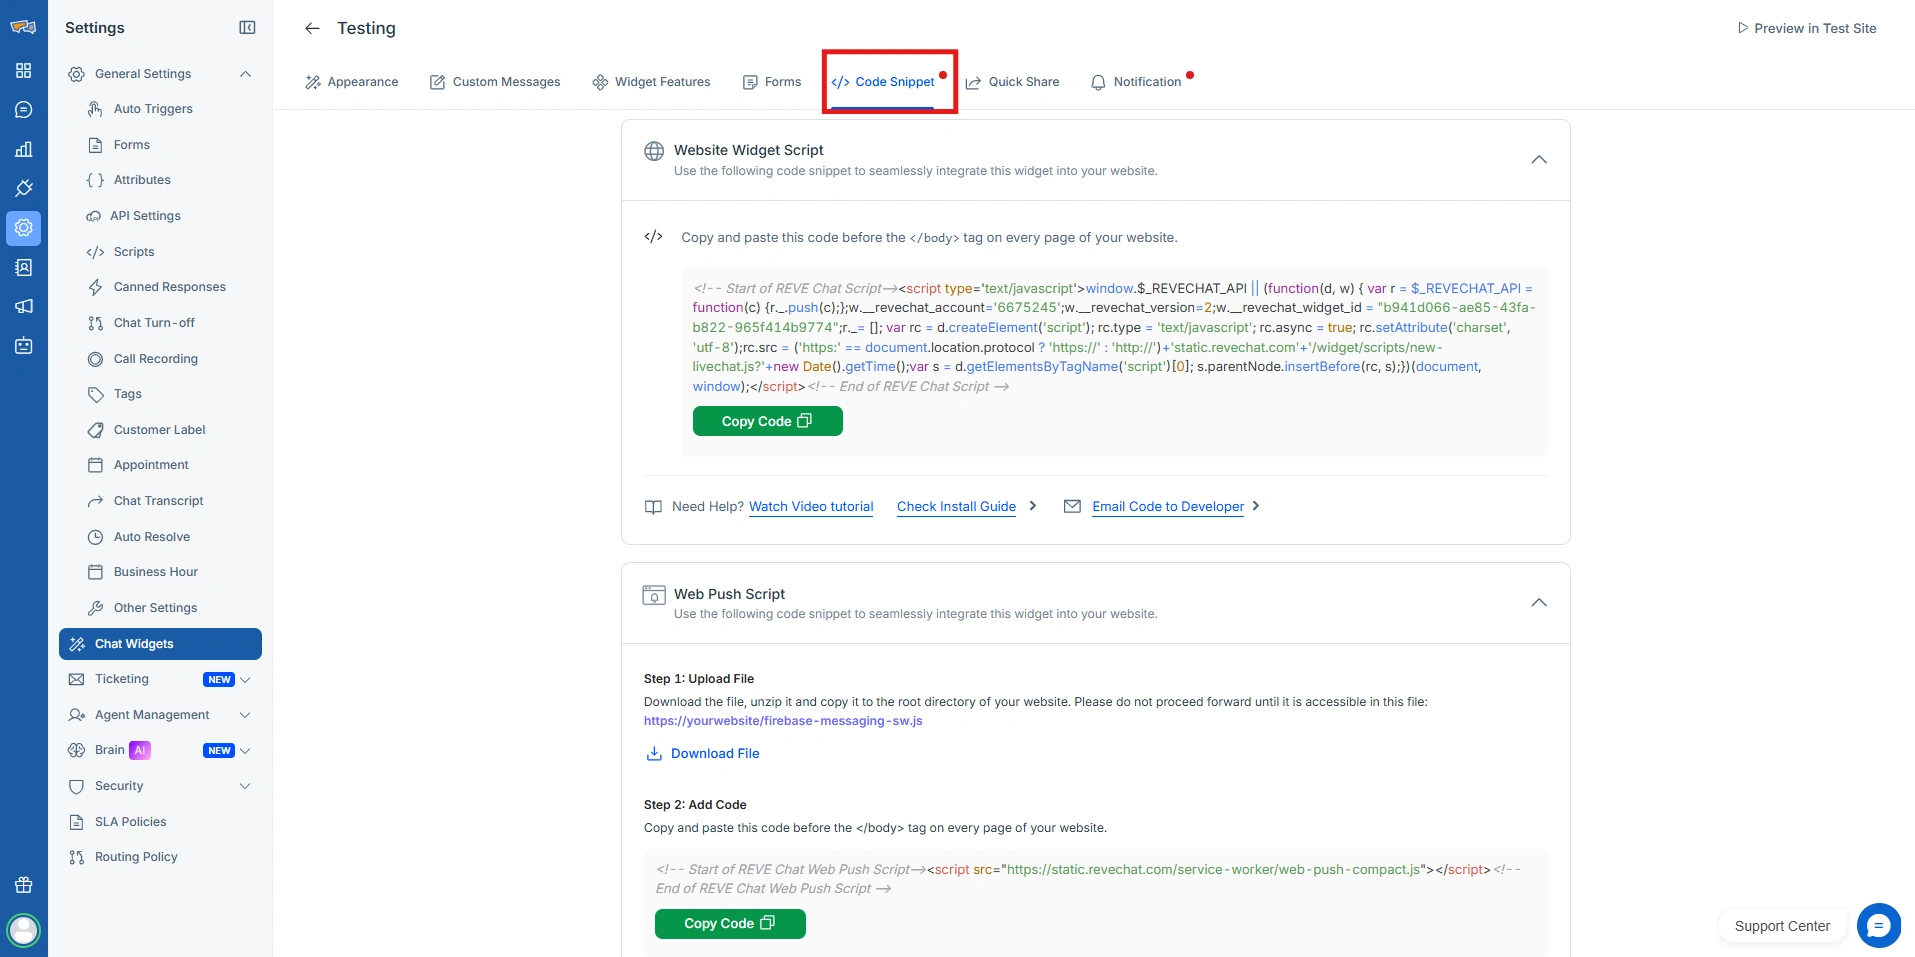
Next, you can customize your widget to give it a nice look, fitting your brand. On the page, you can explore tabs like Appearance, Custom Messages, Widget Features, Forms, Code Snippet, Quick Share, and Notification.
To set up Web Push, go to Code Snippet. There, you need to add Website Widget Script (if not done already) and Web Push Script. Copy both codes or just the Web Push Script and paste them into your website’s header section. This integration ensures your visitors can start receiving notifications right away.
Step 3: Customize Your First Notification
Before you can send any updates, your website visitors must opt in to receive web push notifications. This step is all about creating that first notification, the permission prompt, which asks users for their consent.
First, you need to customize how your first notification will look by adding icons, changing the text, and so on. On the right, you can also see how the notification will look in real-time.
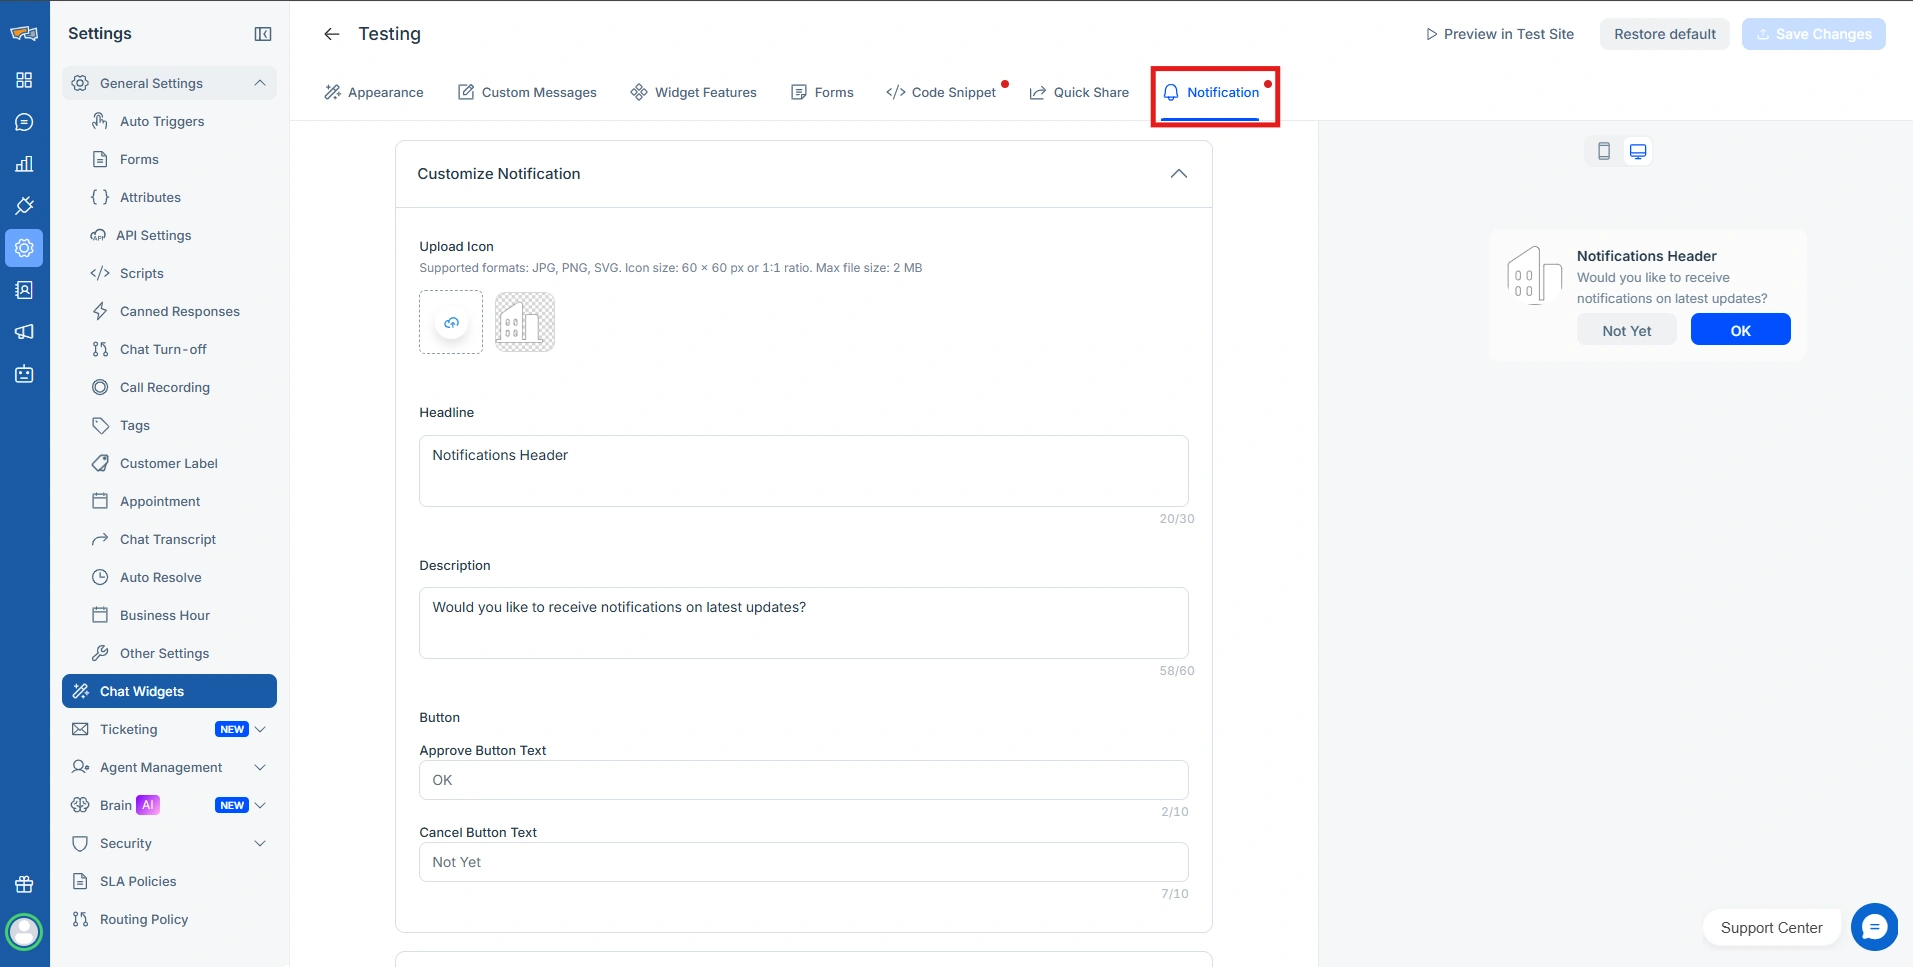
Your prompt is the first impression your visitors get. Make it count. REVE Chat makes it easy to create engaging, branded notifications:
- Custom icon: Use your logo to build trust.
- Headline & description: Clearly communicate the value of subscribing, e.g., “Stay updated on exclusive offers and news!”
- Engaging and Relevant Buttons: Add unique button text instead of the monotonous Yes or No schemes.
Preview your prompt on desktop or mobile, or even test it on a sample site. A polished, relevant prompt increases opt-ins and sets the stage for successful campaigns.
Step 4: Set Up Your First Notification Settings
Next, setup the notification settings. This lets you decide when the notification appears, such as immediately, after a few seconds, or after a set number of page views. You can make the opt-in experience smoother and less intrusive.
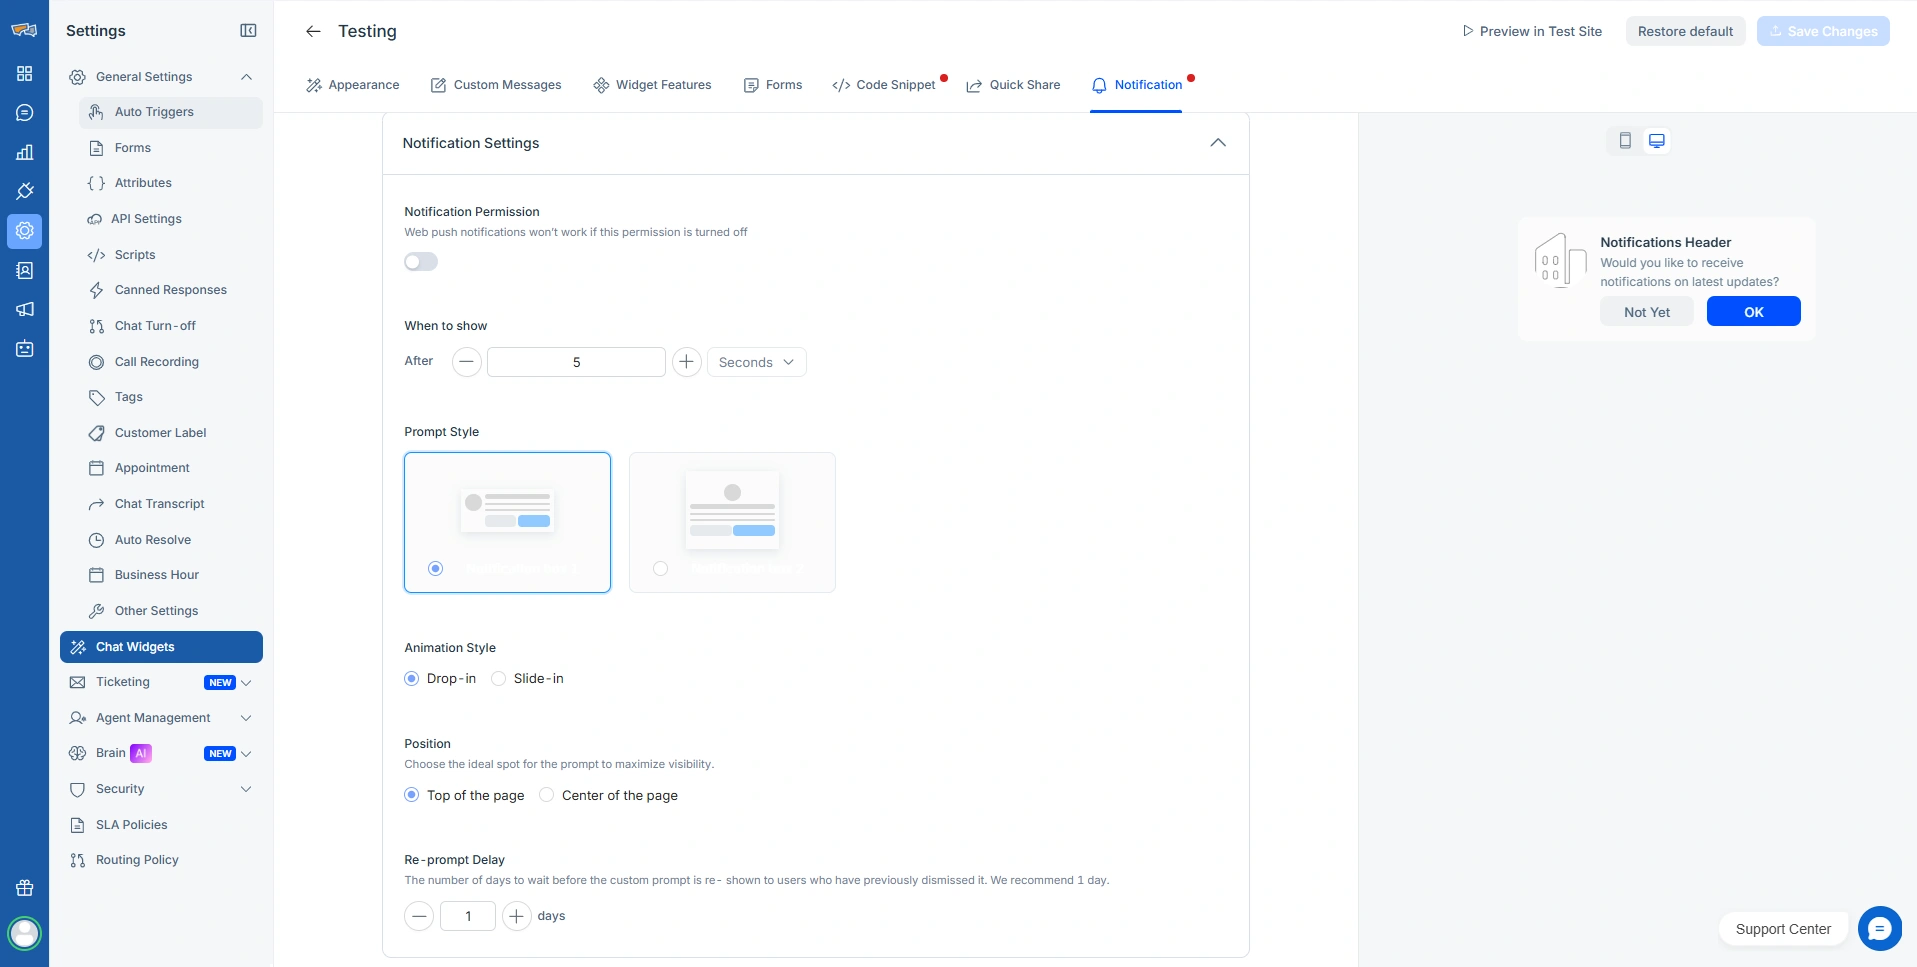
Here, you set up the following to create a neat way for the notification to grab the attention of your customers.
- Notification Setting: Turn this on or no customer will get this notification.
- Timing: Show prompts immediately, after a set number of page views, or after specific seconds.
- View type & animations: Choose styles like “Drop-in” or “Slide-in” to grab attention. Also set where the notification will show up.
- Re-prompt delay: If a user declines, you can try again later without being intrusive.
Step 5: Create Your First Web Push Template
As you have no set up your first notification, users will opt-in for notifications and you will get a list of customers or browsers interested in what you have to offer. To target these prospective customers, you need to go to Campaign, then Template, and then the Web Push Tab.
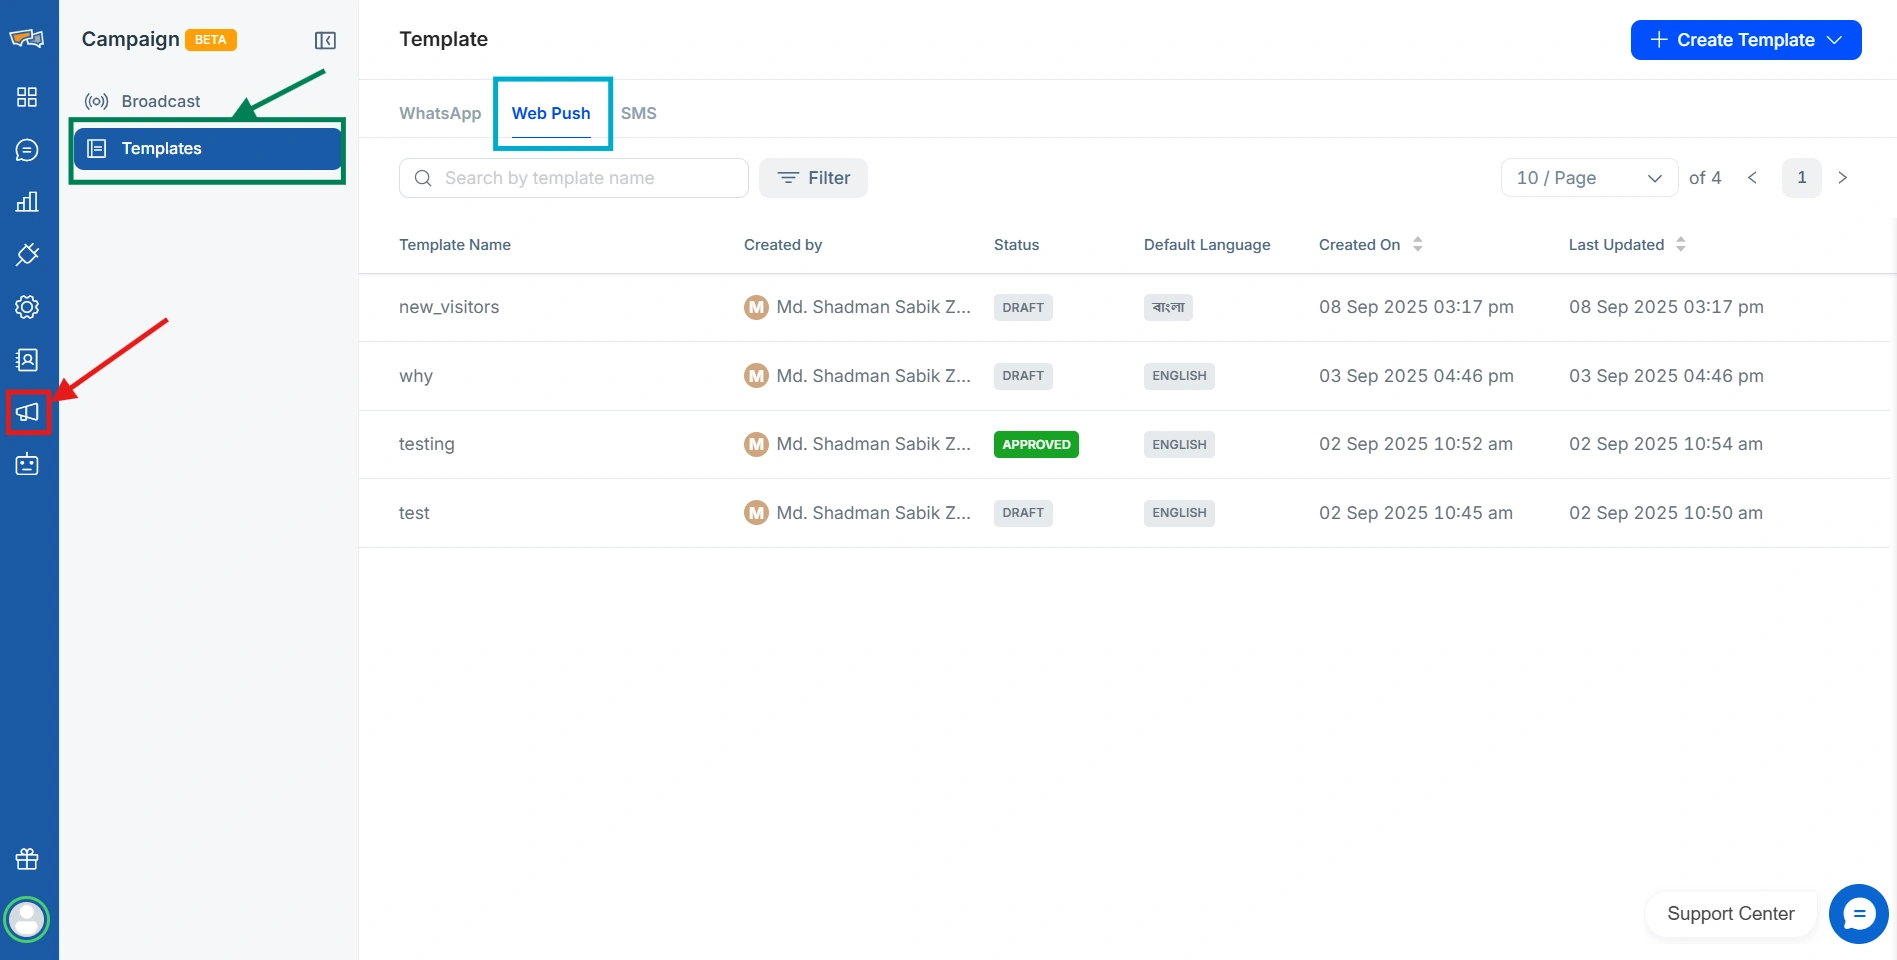
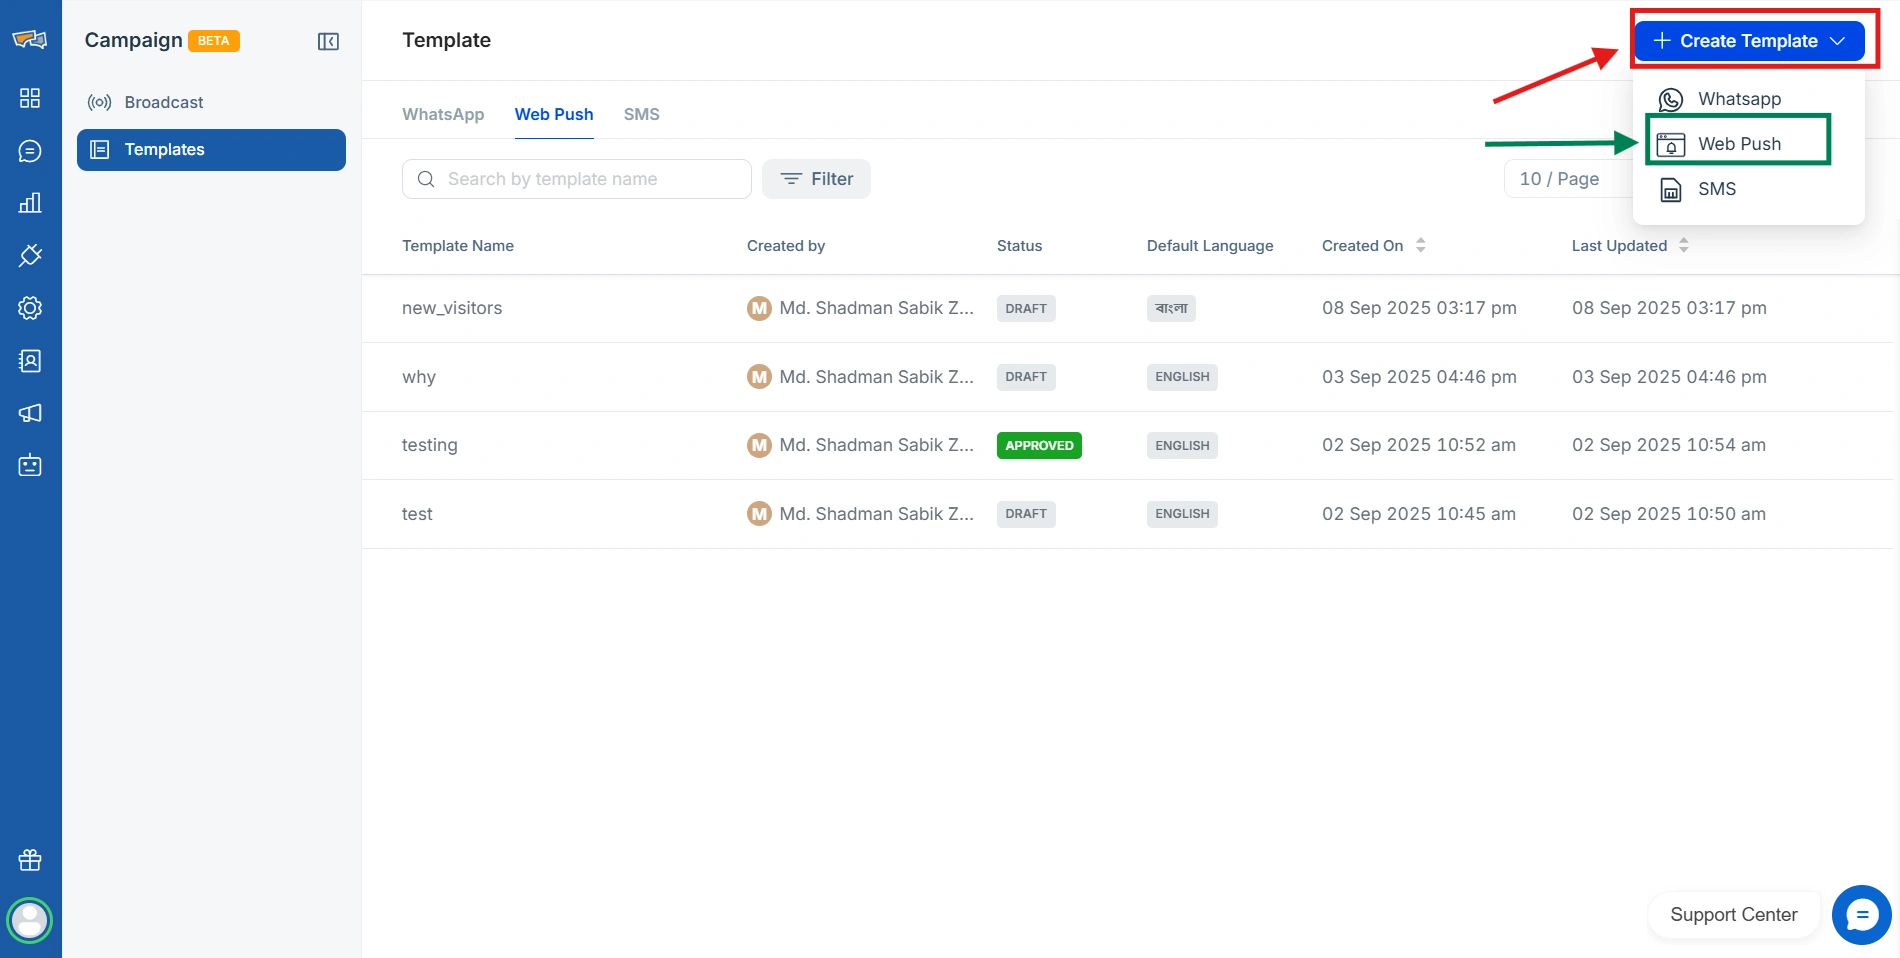
After that, you can see your existing templates and check their statuses. To get started, hover over the Create Template at the top right, and select Web Push.
Step 6: Design Your First Web Push Template
Fill out the pop up that appears with the Template Name and Default Language.
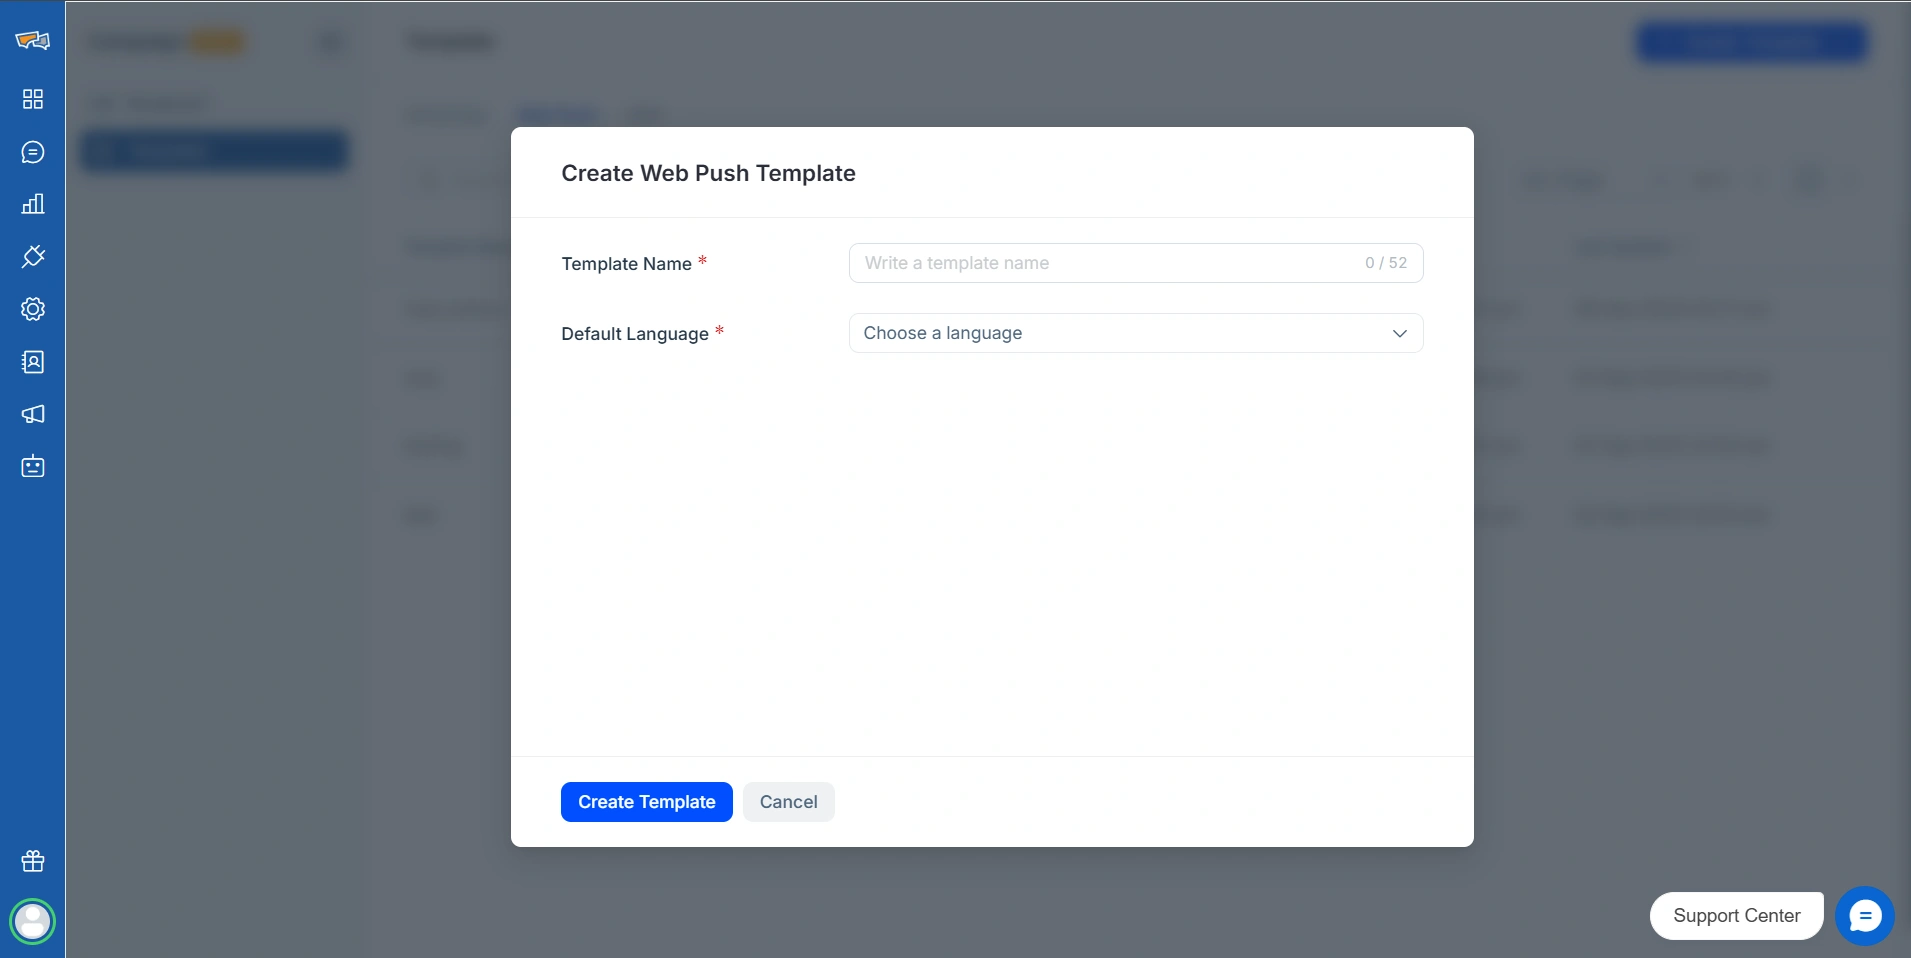
Click Create Template, and you come into our Template Builder where you can do the following.
- Header text: Up to 70 characters for a catchy title.
- Body text: Up to 250 characters, with rich text formatting and optional attributes.
- Icon & banner image: Optional branding or promotional visuals.
- Destination URL: Include optional UTM tracking.
- Buttons: Add up to two CTAs, e.g., “Shop Now” or “Learn More.”
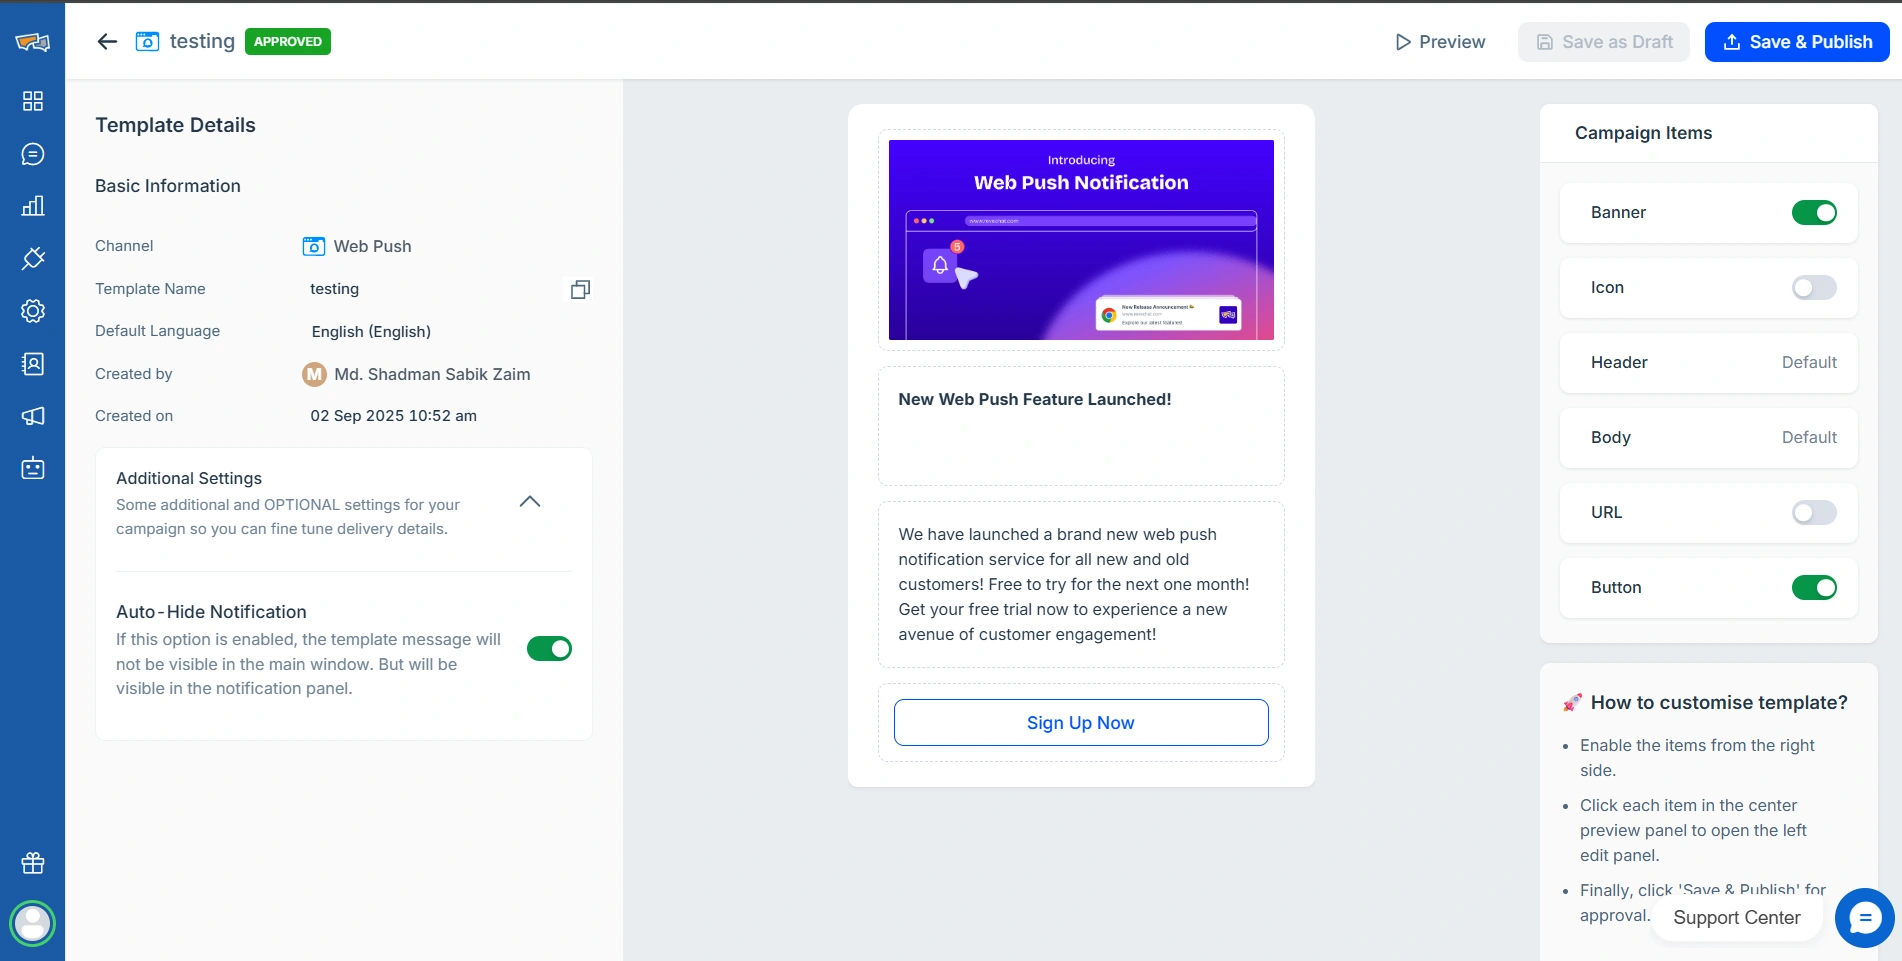
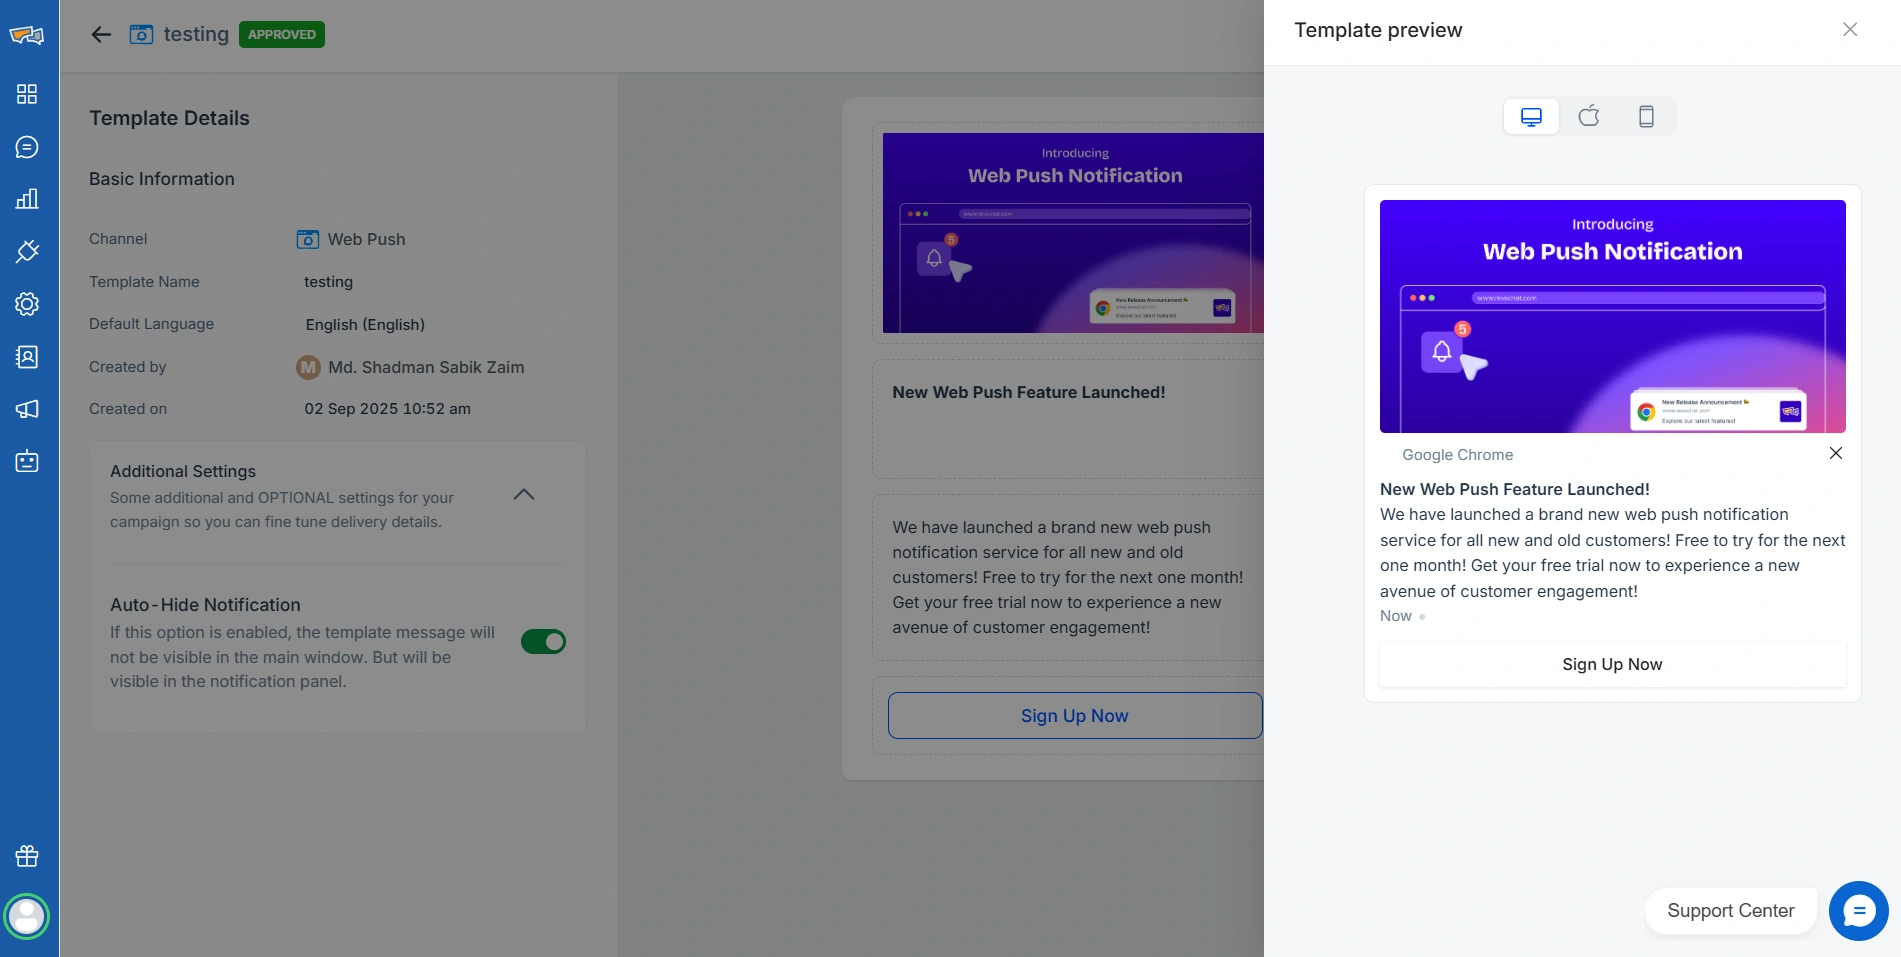
Advanced options like auto-hide and expiry keep messages fresh and relevant, preventing notification overload and enhancing user experience. You can also preview the template and check in on the test site as needed.
Step 7: Broadcasting your campaigns
Once templates are ready, it’s time to broadcast. Send notifications to all subscribers or target specific segments. REVE Chat allows precise targeting based on user behavior, domain, or timing. Focus on users who have shown interest in certain content for maximum engagement.
Go back to the Campaign tab and now Broadcast to start creating your first web push campaign.
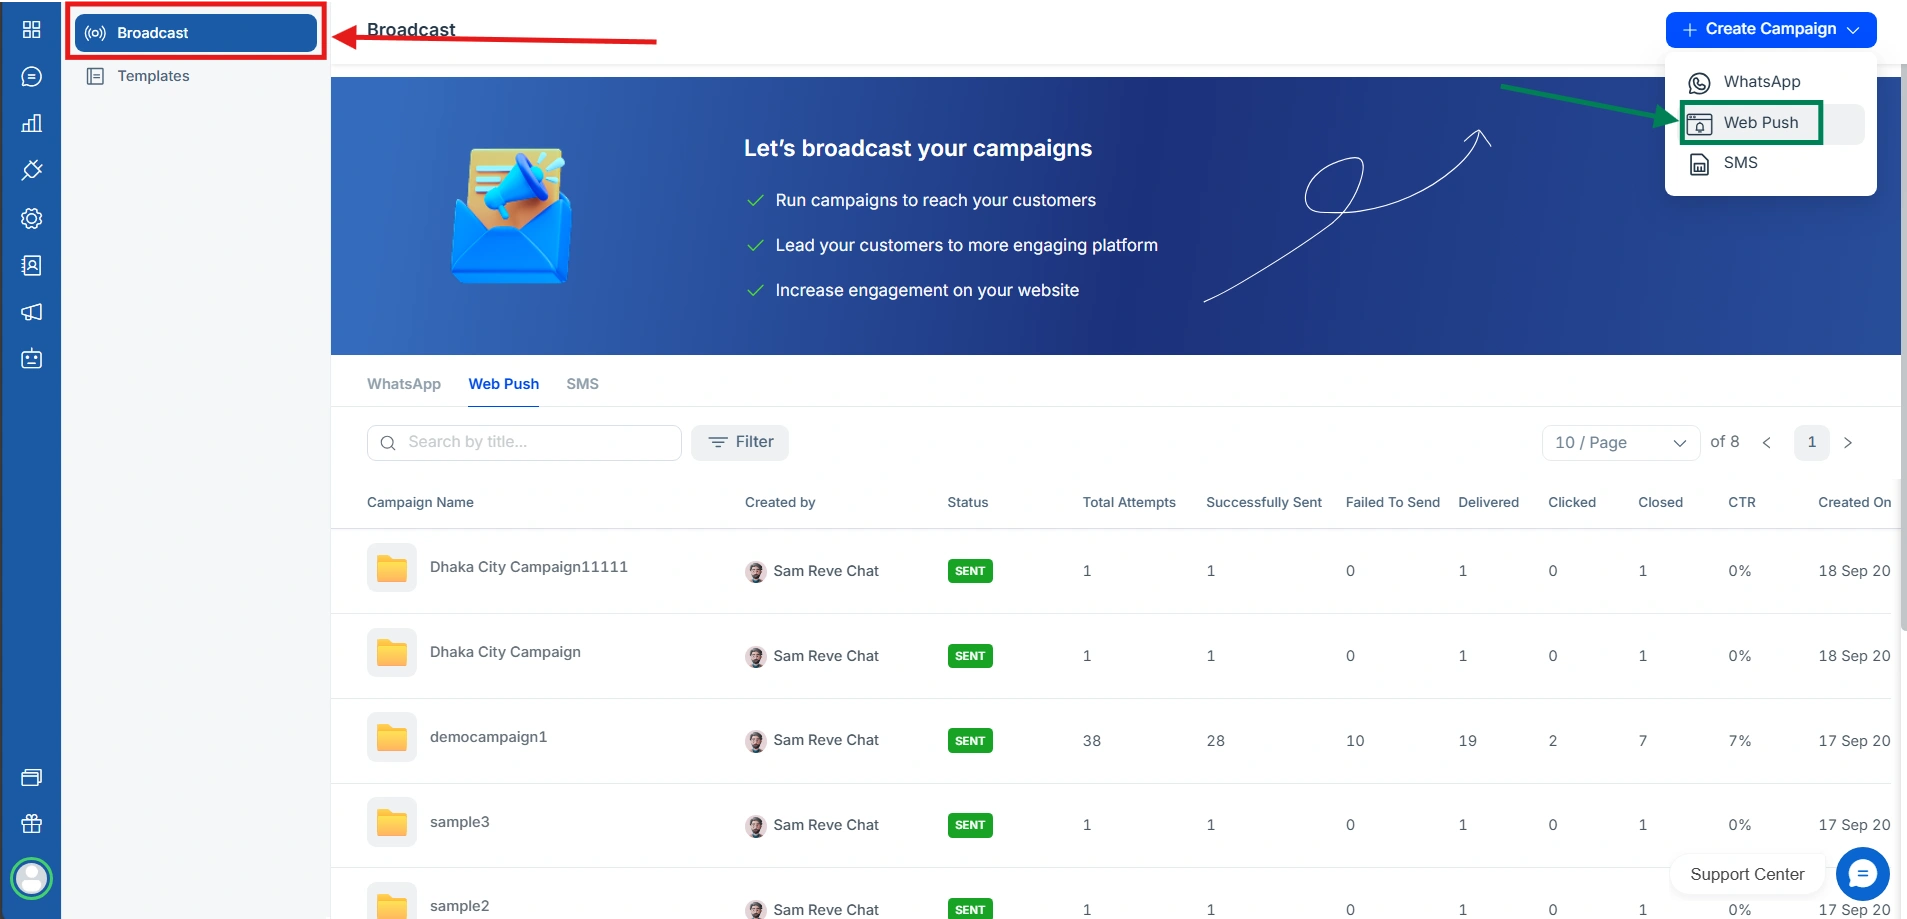
One you click Web Push under Create Campaign, you will get this pop up to fill out the form with Campaign Name, Message Template, Target Audience, and Choose Schedule.

Give it a name, choose the Template you created earlier, and create your own segment or choose a default one. Then choose to either send now or schedule for later. One you are done, you just need to press Schedule on the bottom left.
This step turns setup into action, letting you reach customers off-site with updates, promotions, or launches. Personalized, timely notifications drive clicks and conversions, while unlimited campaigns let you experiment freely and grow your audience cost-effectively.
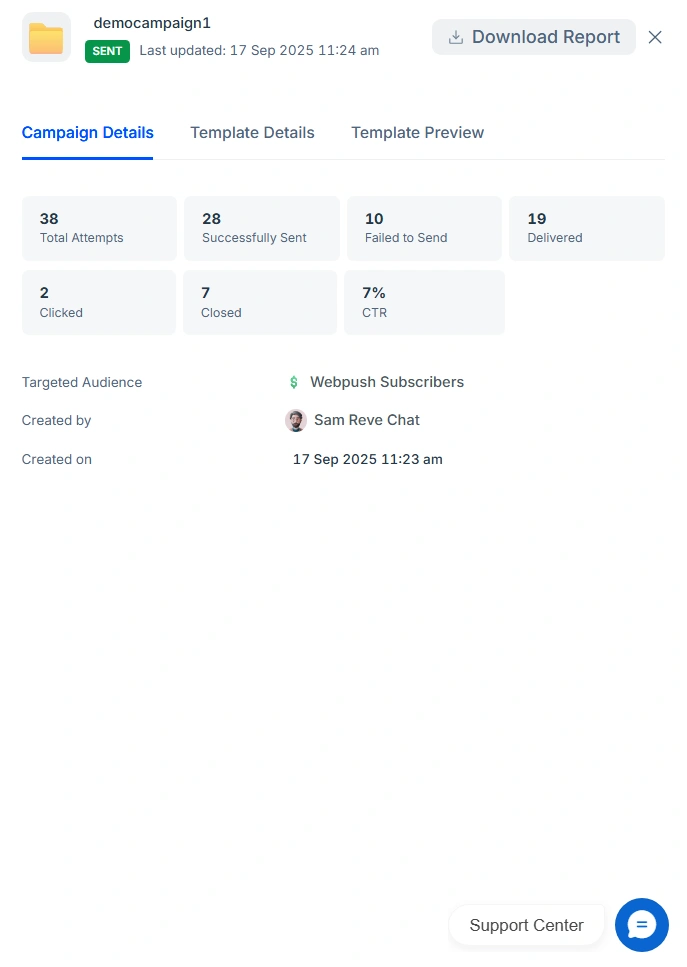
Step 8: Check Campaign Statistics
After some time, you can check the status of your campaign by clicking on any of your created campaigns. You will see a window as follows showing you the full report. One great convenience is that you can download this report if you want a backup or soft copy to share inside your company.
Conclusion
Web Push Notifications with REVE Chat make connecting with your audience effortless and impactful. From designing your widget to sending personalized campaigns, every step helps you engage users in a way that feels natural, relevant, and on-brand.
To experience our web push notification service first hand, Book a free demo today and let one of our specialists walk you through this robust feature.
Frequently Asked Questions
Yes, web push notifications do not require a mobile app. They are delivered directly through web browsers like Chrome, Firefox, and Edge, allowing you to reach users on desktops and mobile devices without the need for an app installation.
Yes! Web push notifications are safe and permission-based. Users must opt in to receive them, and the data transmitted is minimal and secure. REVE Chat ensures compliance with privacy standards, giving both you and your users peace of mind.
A push notification is a short message that pops up on a user’s device.
For example: “Flash Sale! Get 20% off today only, Shop Now!” It’s designed to grab attention and drive immediate engagement without needing the user to open your website first.
Yes! REVE Chat offers free plans that include basic web push notifications. Depending on your needs, you can also upgrade to paid plans for advanced features, multi-domain support, segmentation, and unlimited campaigns.