Web Push Setup Guide
- September 7, 2025
- 3 mins read
Table of Content
To start using Web Push, you’ll first need to integrate it into your website by adding a small setup file and code snippet. Once integrated, your visitors will see a browser prompt asking whether they want to receive notifications from your business. In REVE chat, you can fully customize this opt-in prompt—adjusting the icon, text, and display settings—to match your brand and maximize subscription rates.
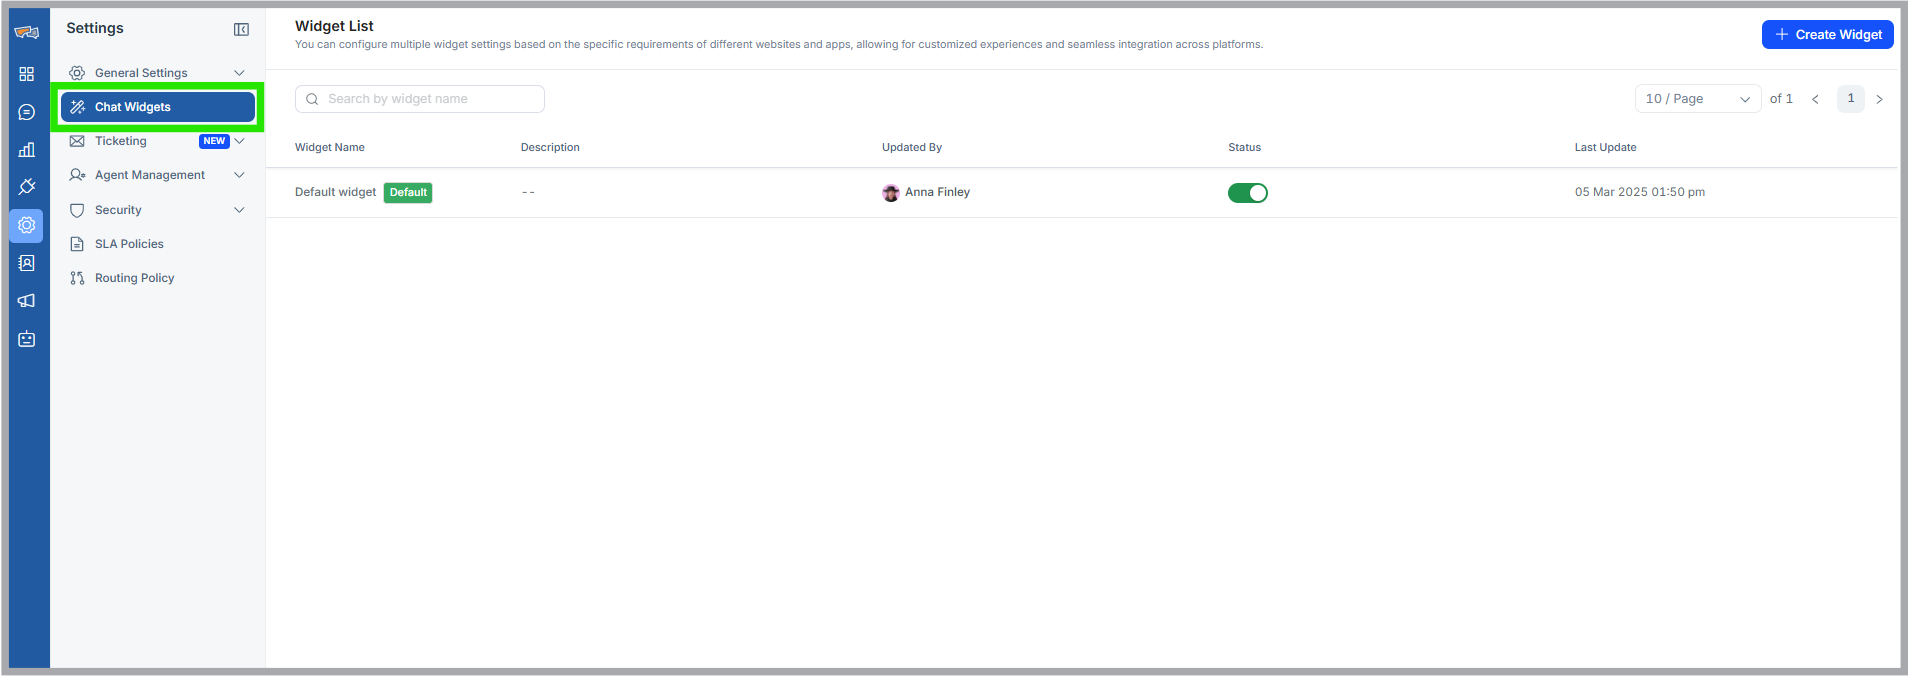
How to Integrate web push on your website
To enable Web Push notifications on your website, follow these steps:
- Navigate to the chat widget section under settings.

- Click a chat widget for which you want to enable the web push feature and navigate to the Code Snippet tab.
- Expand the web push script. From there, click the Download File button. A file named
firebase-messaging-sw.jswill be downloaded. - Upload the downloaded file to the root directory of your website. One placed, you should be able to access it from your browser by going to this URL https://yourwebsite/firebase-messaging-sw.js
- Next click Copy Code button in the step 2, to copy the web push code snippet. Paste it just below the website widget script’s
<!-- Start of REVE Chat Script->and above the<script type='text/javascript'>that you have integrated in your website .
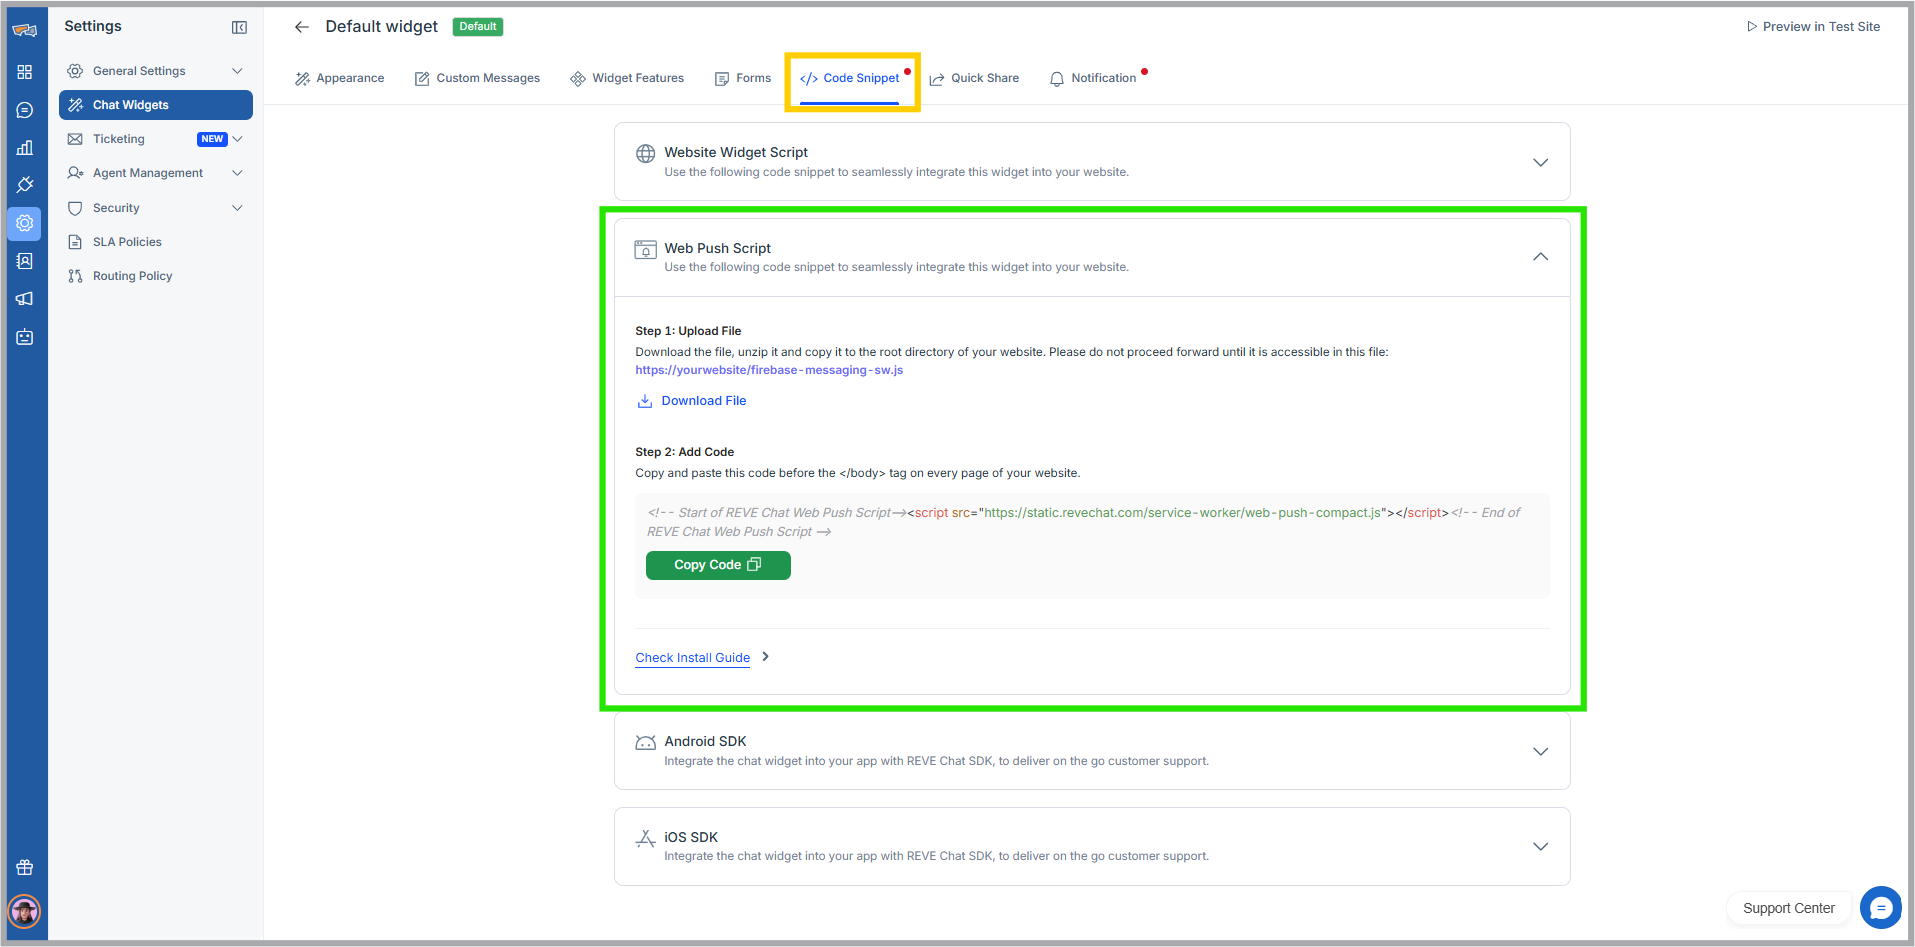
After completing these steps, your website will be ready to send and receive Web Push notifications.
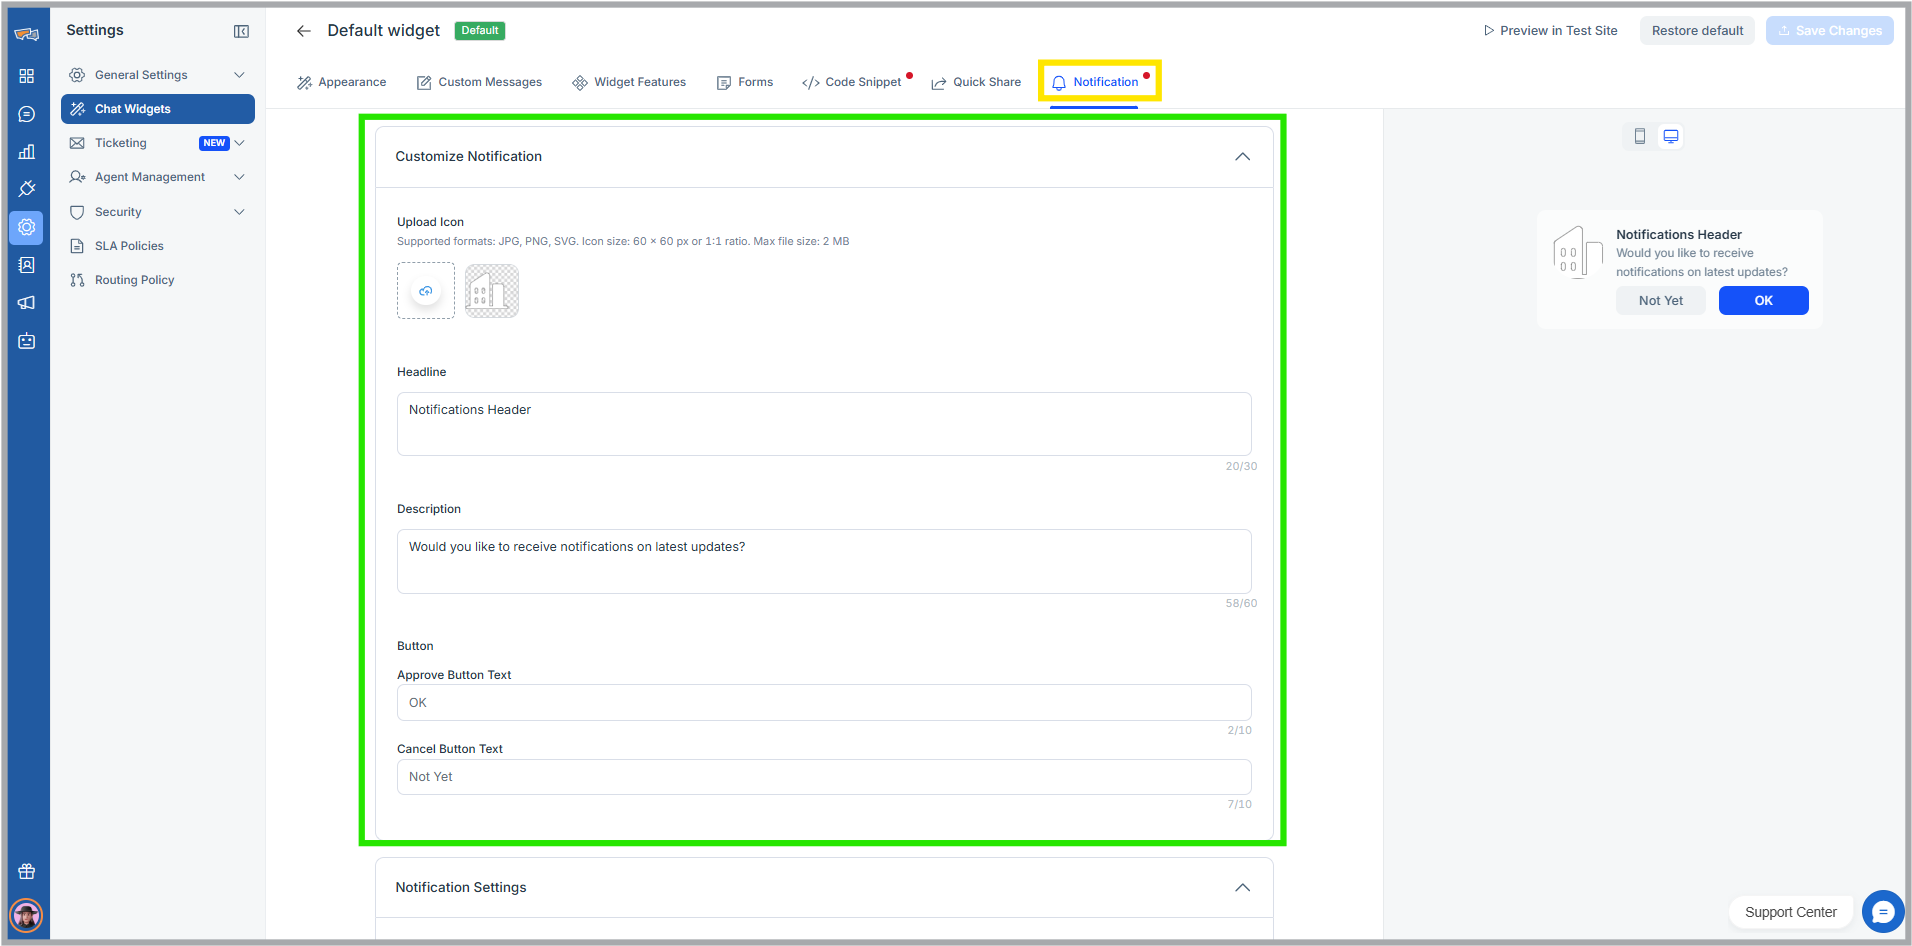
Customizing the web push opt-in prompt
To customize the opt-in prompt follow the below steps:
- Navigate to the chat widget section under settings.
- Click a chat widget for which you want to enable the web push feature and navigate to the Notification tab.
- Upload an icon such as your brand logo or any image you want displayed in the prompt.
- Enter a short headline that tells users what the prompt is about.
- Add a description explaining why you’re requesting notifications, such as updates, offers, or news.
- Customize the text of the approve button (e.g., “Yes, Notify Me”) and cancel button (e.g., “Maybe Later”).
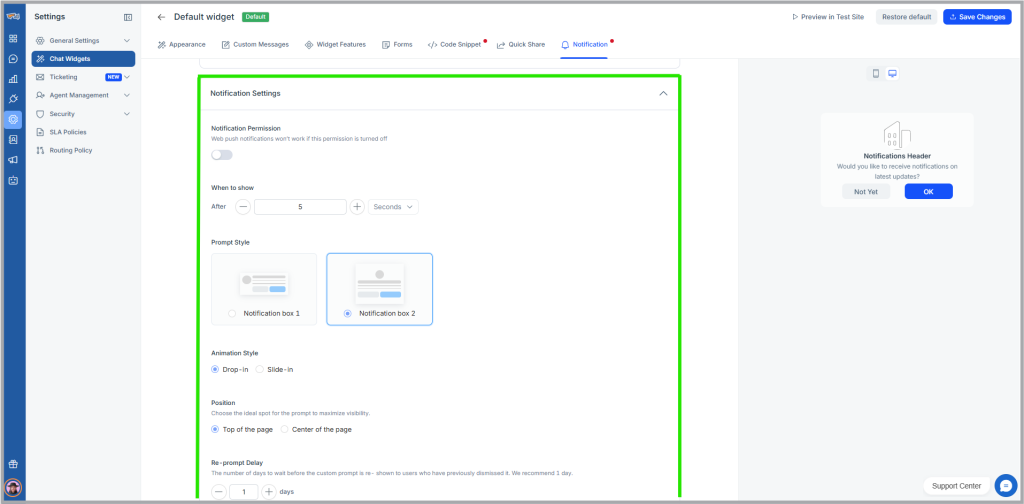
Configuring opt-in prompt settings
Users can configure where to show or when to show the opt-in prompt notification using the notification settings. Follow the below steps to configure the notification settings by scrolling down-
- Enable Notification Permission
- Turn on the toggle to allow opt-in notifications on your website.
- Set When to Show the Prompt
- After a visitor spends a certain number of seconds on the site.
- After a visitor views a specific number of pages.
- Customize the Prompt Design
- Design Style: Select from two available designs.
- Animation: Choose how it appears—Drop-in or Slide-in.
- Position: Decide whether to display the prompt at the top of the page or in the center for maximum visibility.
- Configure Re-prompt Delay
- If a visitor declines the notification, set after how many days the opt-in prompt should reappear.