

Create a ticket manually
- July 27, 2025
- 2 mins read
Table of Content
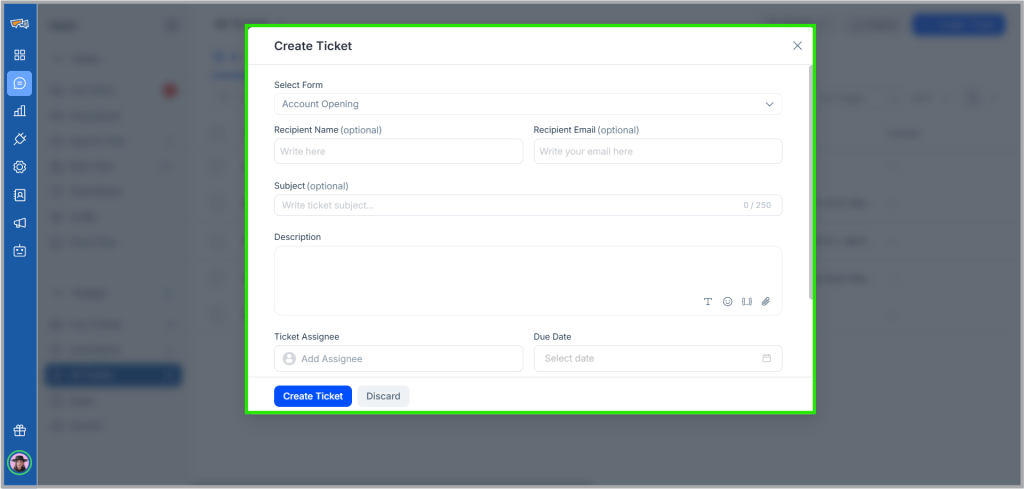
From any of the ticketing page, your agents and admins can create ticket simply by clicking on the ‘Create Ticket’ button. A pop-up will appear where we have to select a form from the drop down.
To create a ticket you need to fill up the necessary fields of the form. The below items can be optional or mandatory depending on the users requirements.
Ticket Subject
To create a ticket you must add subject to the ticket. It will be the subject of the ticket and it cannot be changed once created.
Description
To create tickets users need to add the details of the ticket in description field. Users can write the details, add some attachment, add links, and emoji to send to their customers. Users can not add attachments more than 10 MB.
Assignee
Assignee is the person / agent who is responsible for a ticket. Users need to assign one agent to maintain a ticket. However, one agent can be added in multiple tickets, to work parallelly. Users can only add assignee from the agents list, not an external members.
Ticket Tags
To work more efficiently on the tickets, users can Add Tags to their tickets. Users will get previously created active tags in the suggestion, or create tags on the fly. If a previously created tag is disabled by an admin, agents can not create the same tag. They need to ask admin to enable that tag.
Recipient Name
It’s the name of your customer to find him in the ticketing system. For repeating customers you can easily find their issues once searched by their name. Recipient name cannot be changed once added.
Recipient Email Address
Add email address of your customer whom you want to give solution. Recipient email address can not be changed once added.
Recipient Phone Number
This is an optional field, if you want your visitors’ profile to be updated and get back to them any time.