Auto Triggers
- July 8, 2025
- 2 mins read
Table of Content
Implementing Chatbot with auto trigger is one of the best possible ways to communicate with customer and get their attraction based on various segments. The below image is the list of triggers added in the website. Clicking Add Trigger button will give option to add more triggers.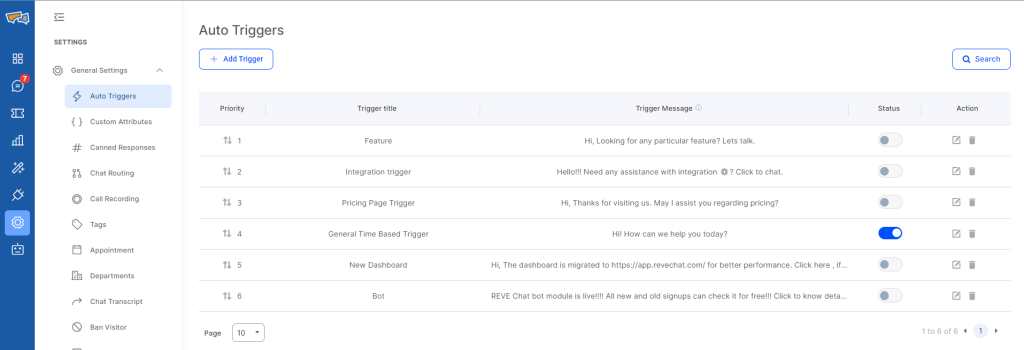
After clicking the add button a pop-up will appear. Here the administrative user can give a title to the trigger for better organisation. There are 3 main elements of a trigger:
- Banner
- Header Message
- Sub Header Message
To add GIF or a banner image (optional) enable the trigger banner option, give a header message and lastly sub-header message (optional) that will be visible to the visitor.
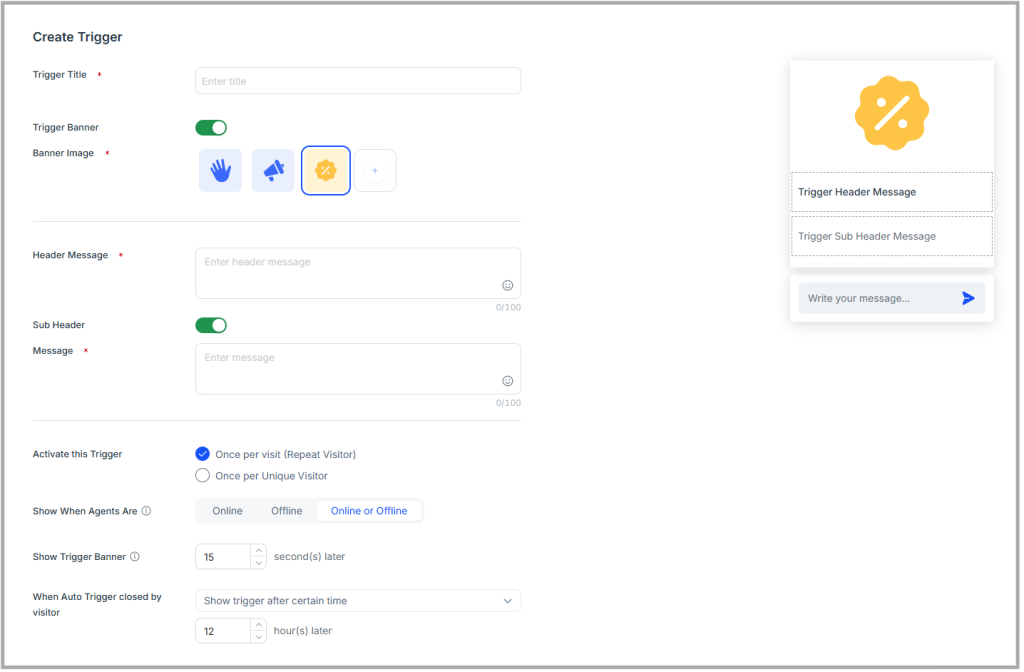
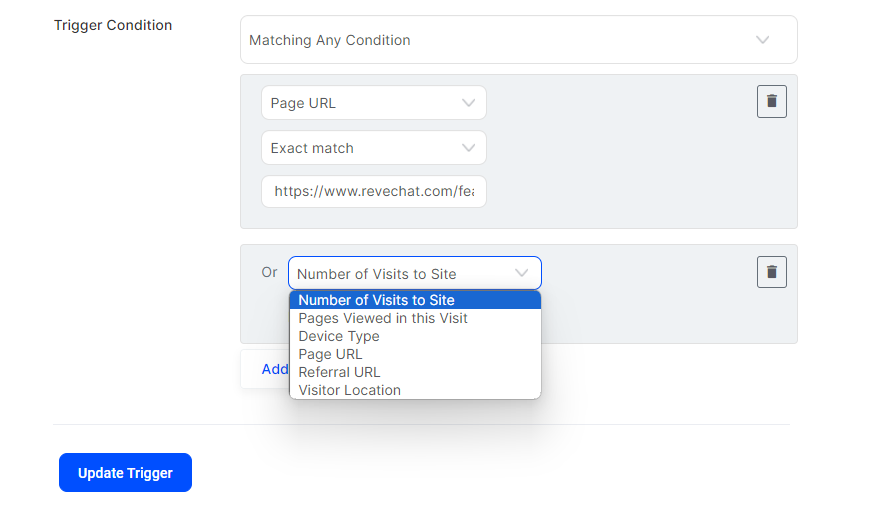
Users can configure when the message will be triggered. Users can select between like, message will show “Once per Visit”, or it will show only “Once Per unique Visit”. User can select, whether trigger the message when agents are online / offline or both, after a certain time when visiting the selected URL. Users can even select to minimise/remove the triggered message. Lastly there is conditions section for each of the trigger. From here users can select from couple of predefined rules like “Page URL” where we can set for which web page to trigger the message. We can add multiple conditions and trigger the message when a visitor either full fills all the condition or any of the condition.