



What is the Audience Segment?
- July 31, 2025
- 4 mins read
Table of Content
An audience segment is a saved group of contacts that match specific conditions. Instead of selecting campaign recipients one by one, you can use contact information such as channel, location, customer label, tags, browser, or custom attributes to build the required audience.
As you add or change conditions, REVE Chat shows the matching contacts and updates the audience count in real time. You can also combine multiple conditions using AND or OR logic to create more targeted audiences.
Audience segments can be used when preparing targeted WhatsApp, Web Push, and SMS campaigns.
Before You Begin
Before creating a segment, make sure:
- The required contacts are available under All Contacts.
- Contact information such as phone number, channel, label, tag, or location has been collected.
- Imported contact fields have been correctly mapped.
Understanding the Contacts Section
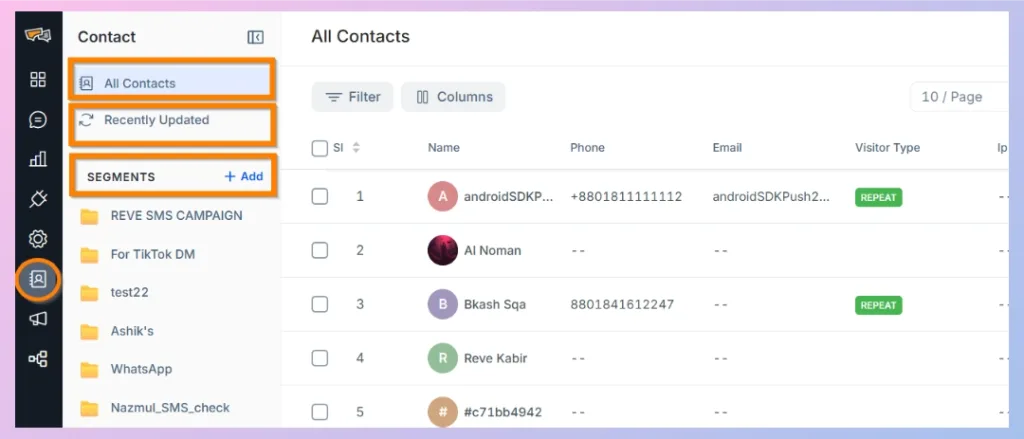
To access your contacts, select the Contacts icon from the left navigation menu.
The Contacts section contains:
All Contacts
The All Contacts page displays the contacts available in your REVE Chat account. Depending on the information collected.
Contacts collected through supported customer conversations, pre-chat forms, and chatbot interactions appear in this section.
Recently Updated
Select Recently Updated to view contacts whose information or attributes were changed recently. The existing REVE Chat contact guide defines this view as contacts updated within the previous 24 hours.
This can be useful when you want to build a campaign audience from recently updated leads or customers.
Segments
Saved segments appear under the Segments section in the left panel. Select a segment to view the contacts that currently match its conditions.
Contact Management Options
Before creating an audience segment, you can review, add, import, filter, or organize your contacts.
Filter Contacts
Select Filter to temporarily narrow the contact list.
Available filtering fields include:
- Last contacted date
- Channel
- Visitor name
- Visitor email
- Visitor phone
- Customer label
Enter one or more values and select Apply Filter.
A filter helps you inspect contacts, but it does not create a reusable campaign audience. To save a reusable audience, create a segment.
Customize the Contact Columns
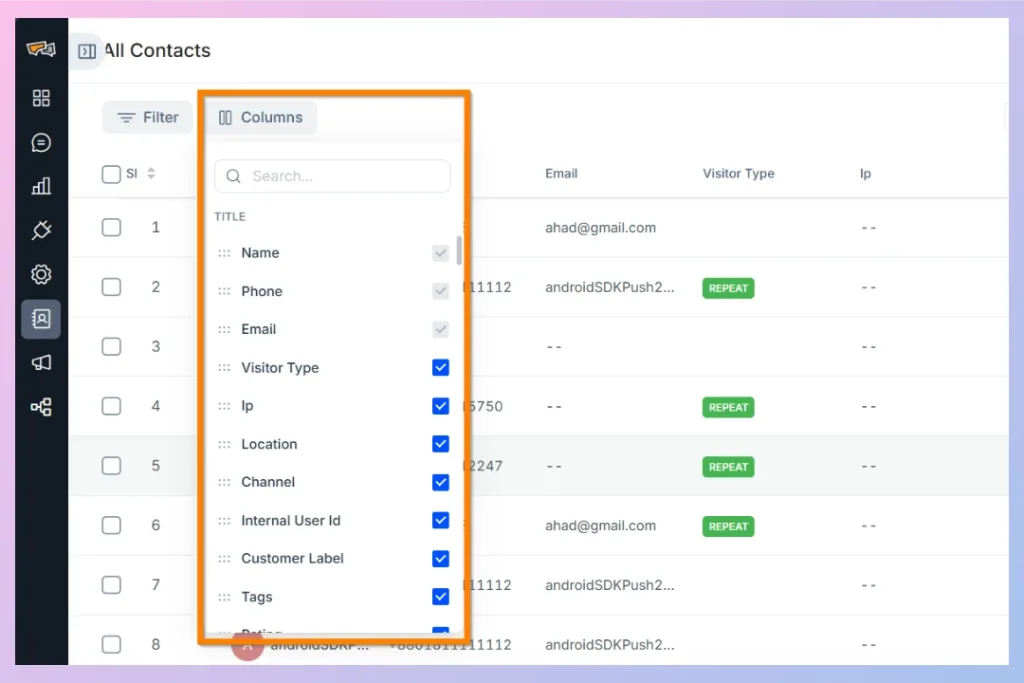
Select Columns to control which contact information appears in the table. You can:
- Search for a column
- Select or clear a checkbox to show or hide a column
- Drag a column using its handle to change its position
This does not change the contact information. It only changes how the table is displayed.
Export Contacts
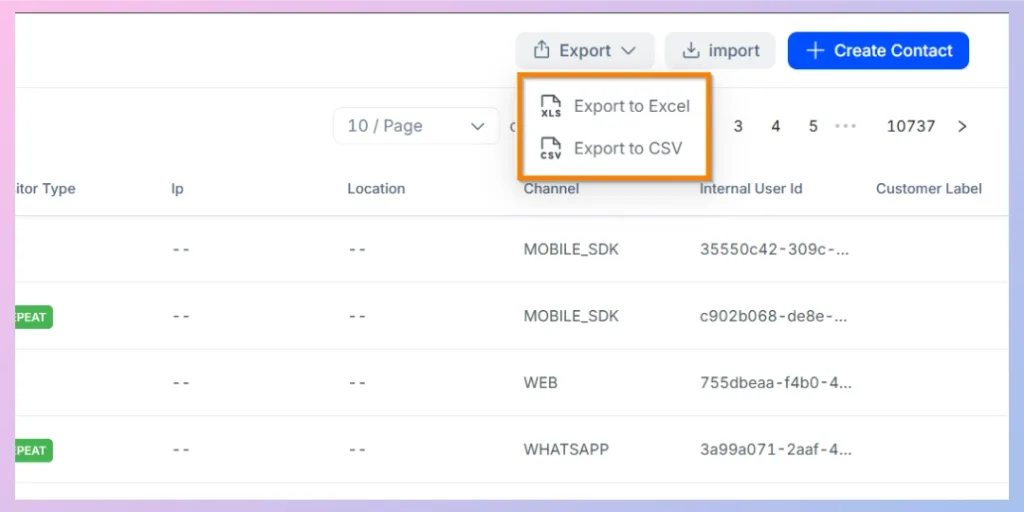
Select Export and choose one of the following options:
- Export to Excel
- Export to CSV
Exporting can be useful when you need to review contact data, clean information, create backups, or perform external analysis.
Import Contacts
Use Import when you need to add multiple contacts at once.
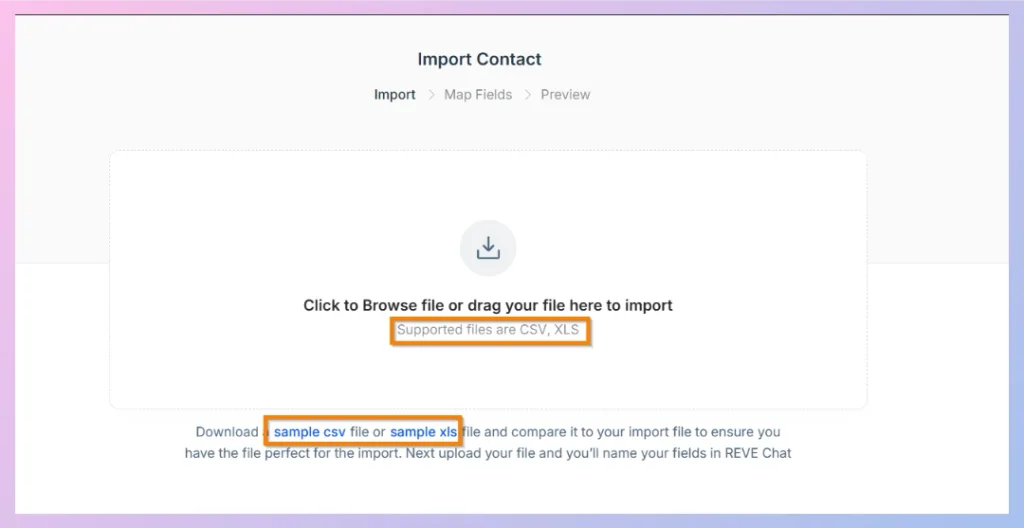
REVE Chat supports:
- CSV files
- XLS files
The import workflow contains three stages:
- Import: Upload your contact file.
- Map Fields: Match the columns in your file with the appropriate REVE Chat contact attributes.
- Preview: Review the contact information before completing the import.
You can click the upload area to browse for a file or drag the file into the upload box. Sample CSV and XLS files are also available to help you prepare the correct format.
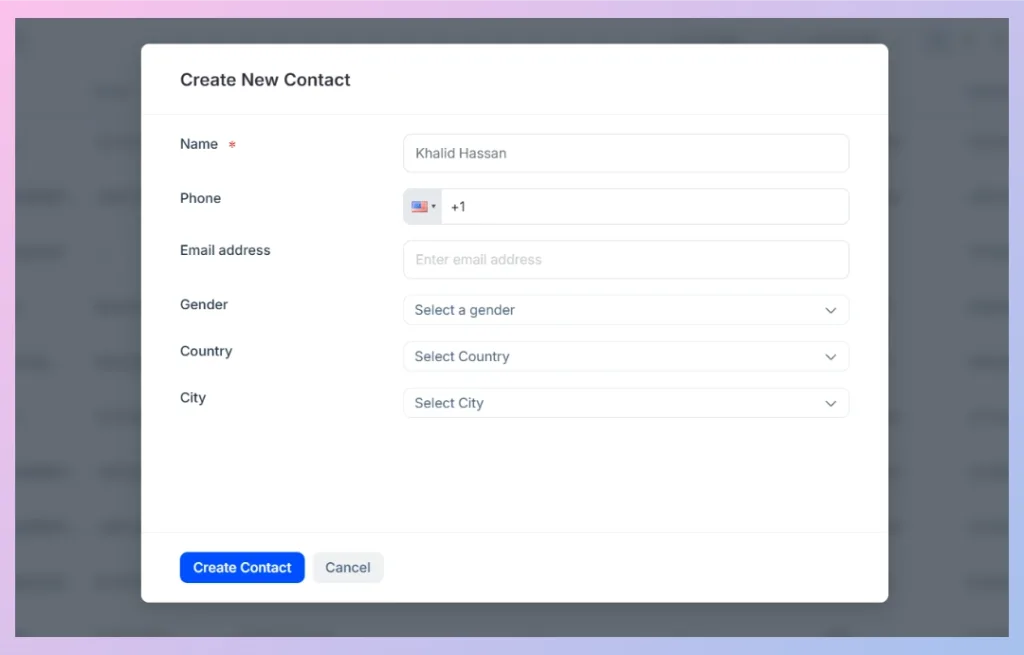
Create a Contact Manually
To add one contact:
- Select Create Contact.
- Enter the contact’s Name. This is a required field.
- Select the appropriate country code and enter the Phone number.
- Enter the Email address, when available.
- Select the contact’s Gender, Country, and City, when applicable.
- Select Create Contact.
Select Cancel to close the form without creating the contact.
Ending Note
Once your contacts are added and their information is properly organized, you can use this data to build targeted audiences for your campaigns. Instead of manually selecting recipients each time, create audience segments based on contact attributes such as channel, location, labels, tags, browser information, or other available customer data.
👉 Next Step: To create an audience segment, follow this guide to the Audience Segment creation page.

 Start free trial