Extension installation
Hoster can install the Extension in following two ways. After installation and configuration of the extension by Hoster, the extension will be available for the customer of the selected plan:
- Downloading the zip file of the extension from Plesk extension directory and upload it to Plesk.
- Download and install it directly from the plesk dashboard (This feature will only be available when the extension is published in the marketplace).
Install the extension by downloading the zip file:
- Download the zip file
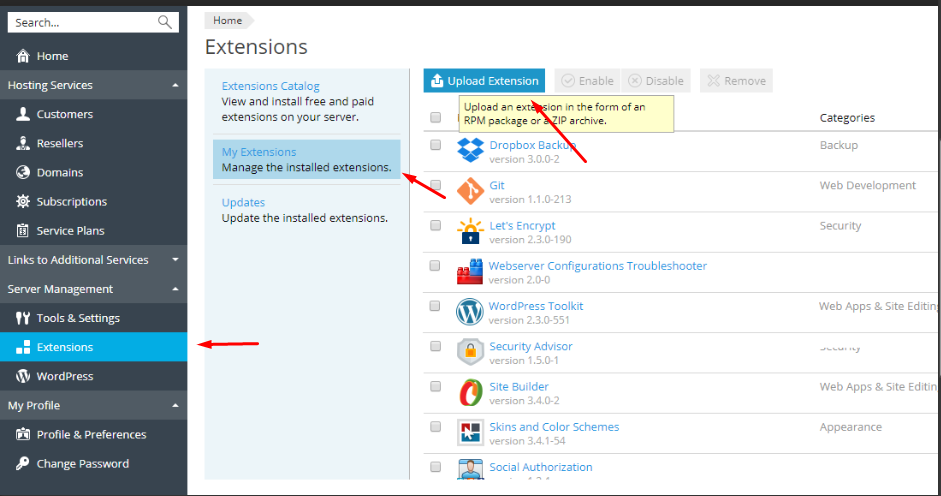
- Login into the Plesk dashboard. Go to Extensions > My Extensions
- Click on Upload extension
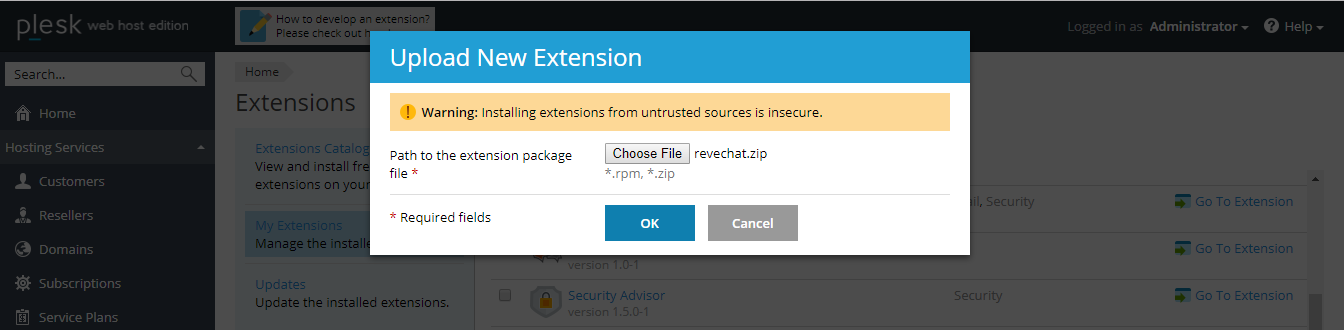
- Upload the file and hit ok.
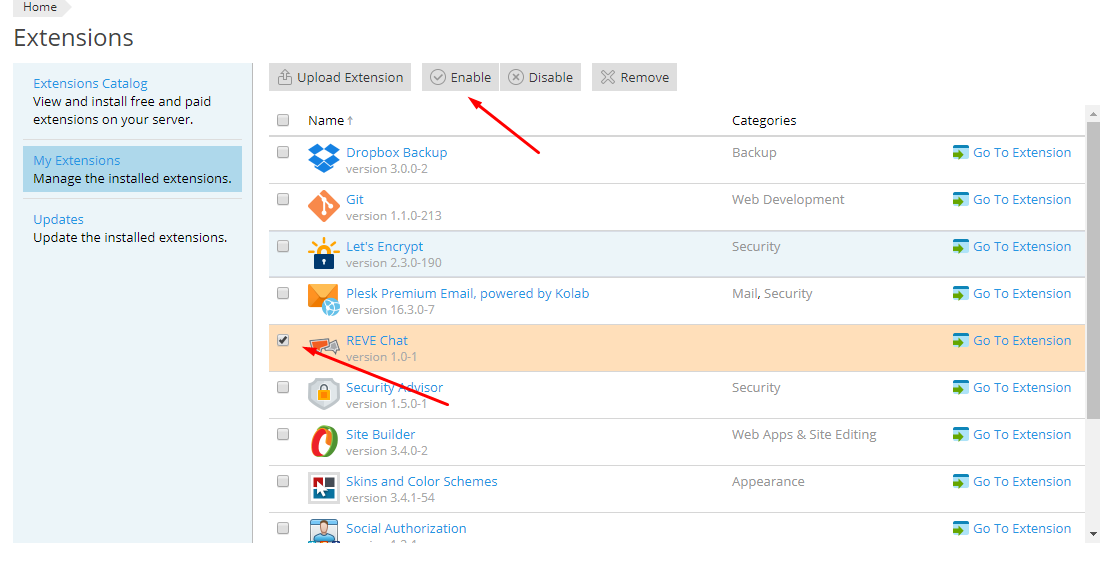
- After successful install user may need to enable the extension. To enable please select REVE Chat by clicking the checkbox and click on
Extension Purchase
REVE Chat offers 2 types of packages for the extension:
- Standard
- Advanced
When the user first installs and configure the extension, his customer will be able to use 14 days free trial of REVE Chat. To provide a standard or advanced package to the customer, the Hoster needs to buy the license for that package. The purchasing process will be done from Plesk store.
- User goes to Plesk store
- Choose package to purchase
- Make payment
After making payment, an activation code or license key file or both will be sent by mail. Then hoster will able to install the license.
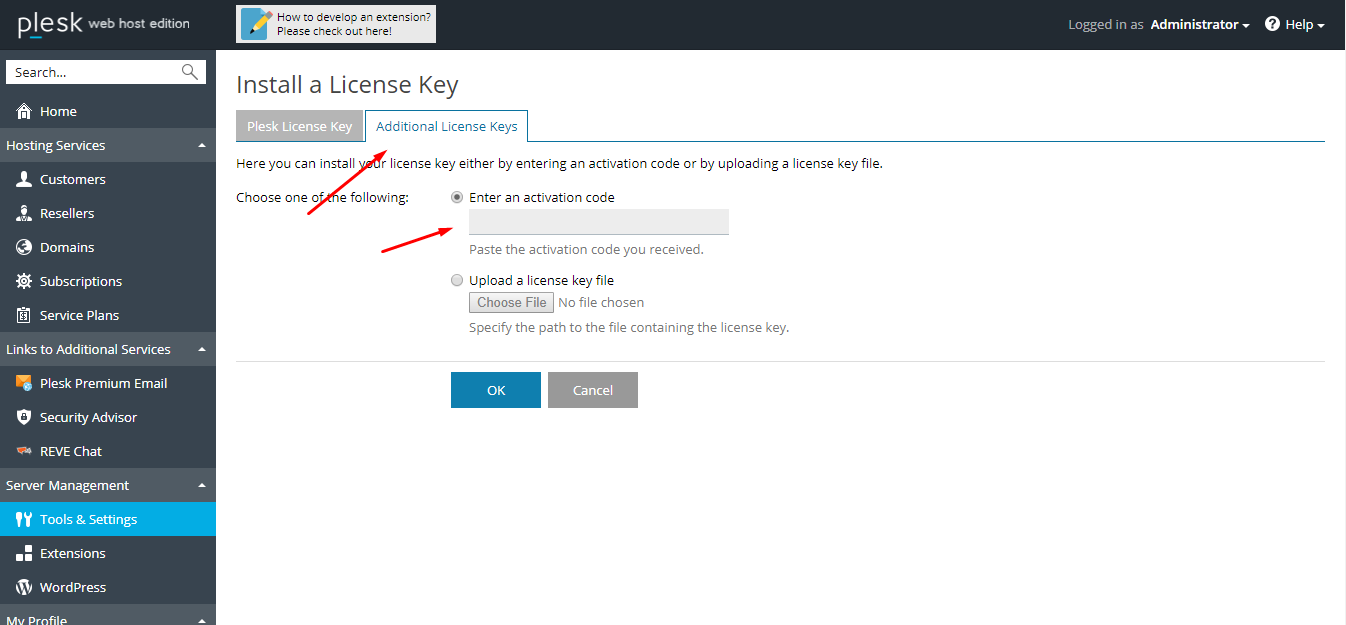
License installation process
- Go to Tools & Settings > License Management
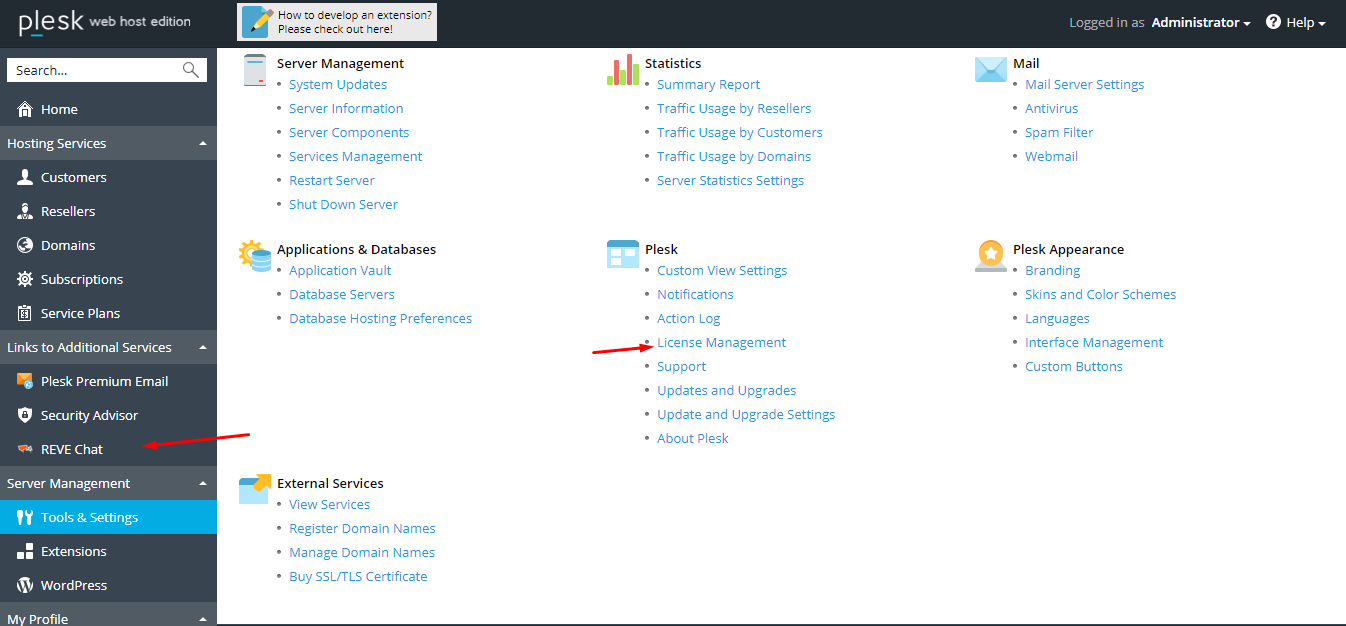
- Now go to Additional License Key > Install Key
- Enter the activation code or upload the key file. And press ok.
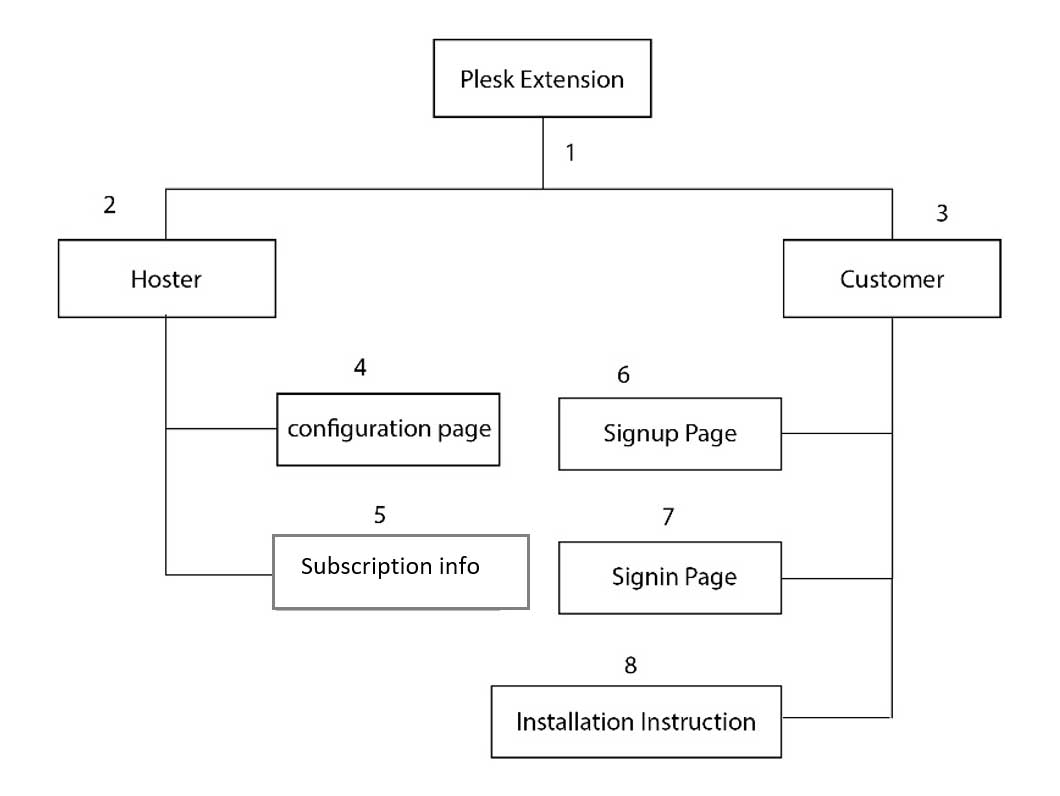
Extension Configuration for Hoster
After successful installation, the hoster can make the extension available to the subscribers of specific subscription plans. To make this extension available to the user, the hoster needs to have at least one subscription plan and the user needs to be subscribed to that plan.
Depending on the hoster/customer there will be following elements of the extension.
Hosters Side:
- Configuration page: Hoster may want to make the extension available to the user of a specific subscription plan. Hoster needs to activate the extension of the subscription plan from this page. This page will display the list of subscription plans that have been created by hoster.
- Subscription Info: This will display user’s current subscription plan and other license information.
To give permission to specific plan
- Service Plans from plesk dashboard.
- click the name of the service plan to which you want to give access to REVE Chat
- Select the plans for which you want to enable the plan.
- Go to Permission Tab
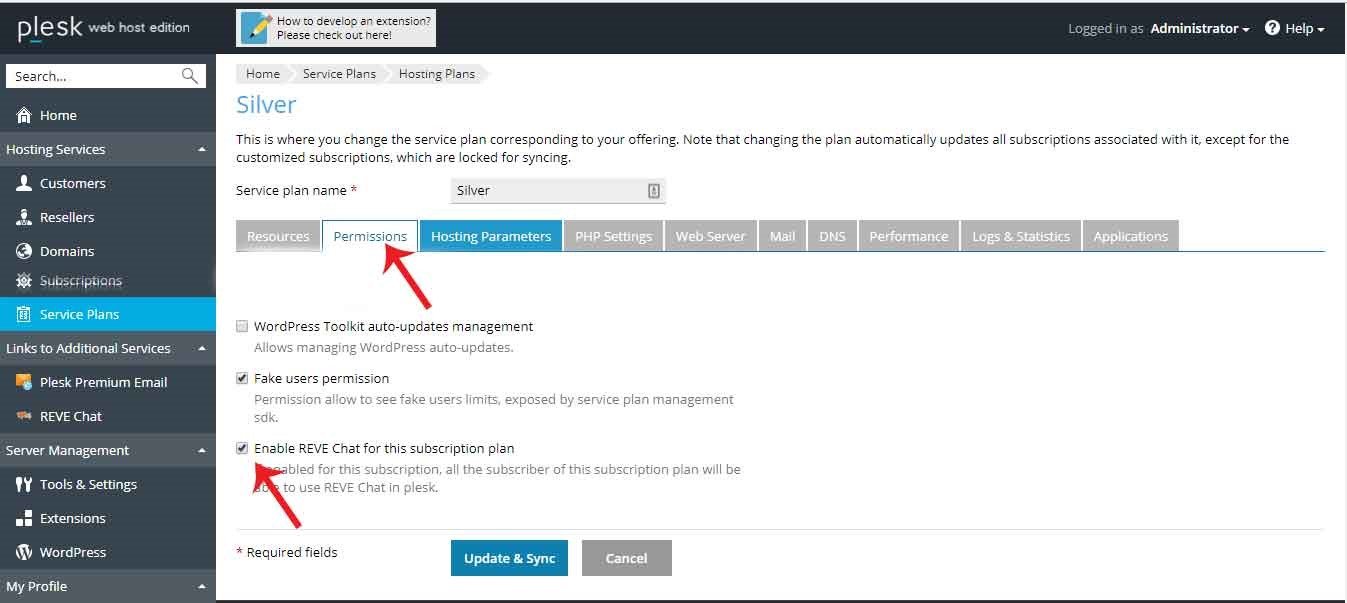
- Check “Enable REVE Chat for this subscription plan”
- Click Update and Sync
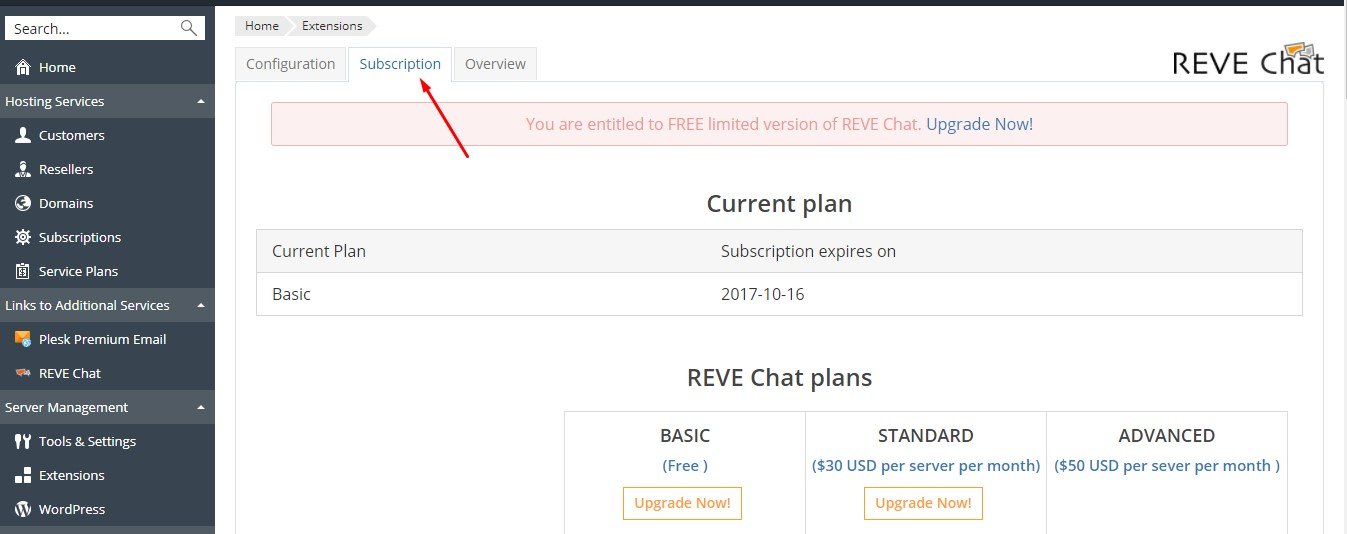
There is also another page ‘Subscription’ which will display the summary of current licensed information.
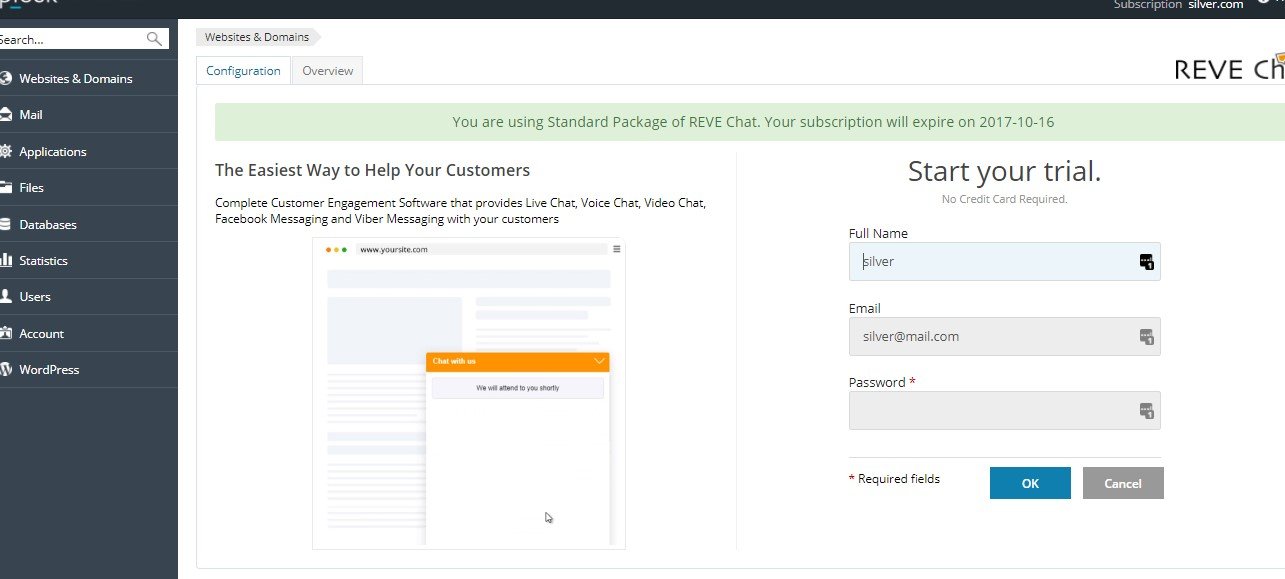
Extension From customer Dashboard
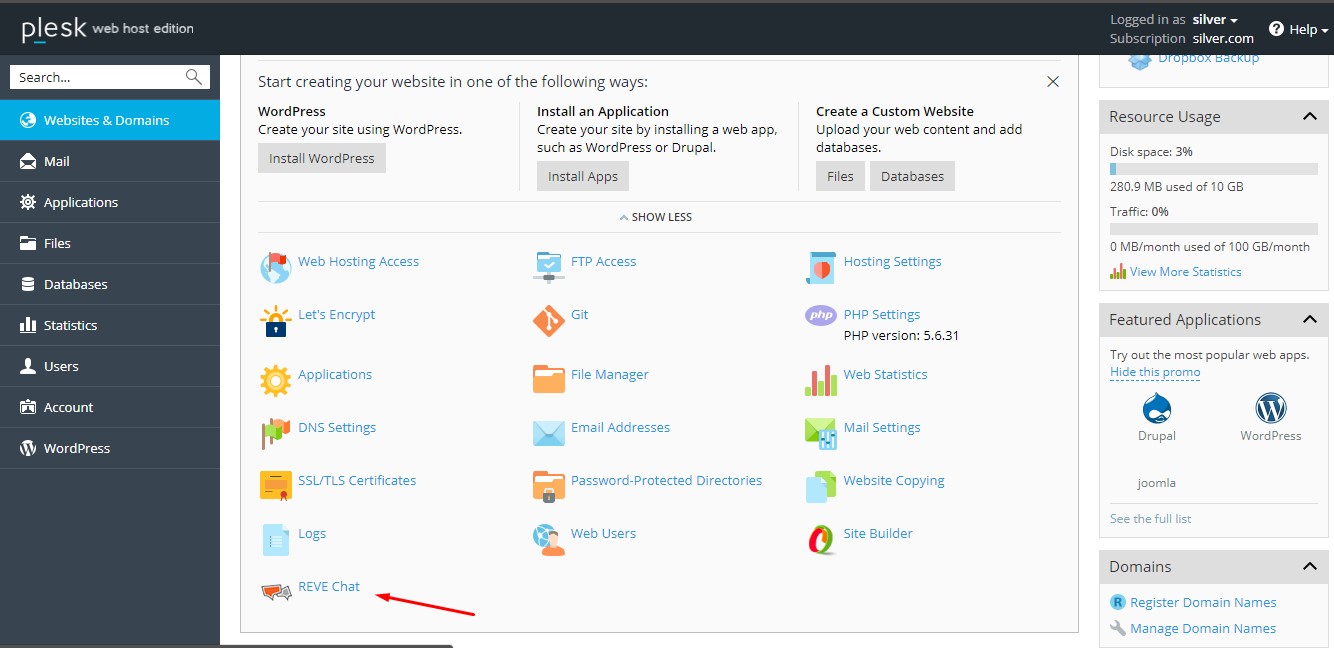
After the hoster enable the Extension for specific subscription plans, then all the user of that subscription plan will be able to user the extension from their dashboard. To use this extension:
- Login in to Plesk Dashboard
- Click on REVE Chat (Note: It will only available if the hoster enabled it for the subscription plan)
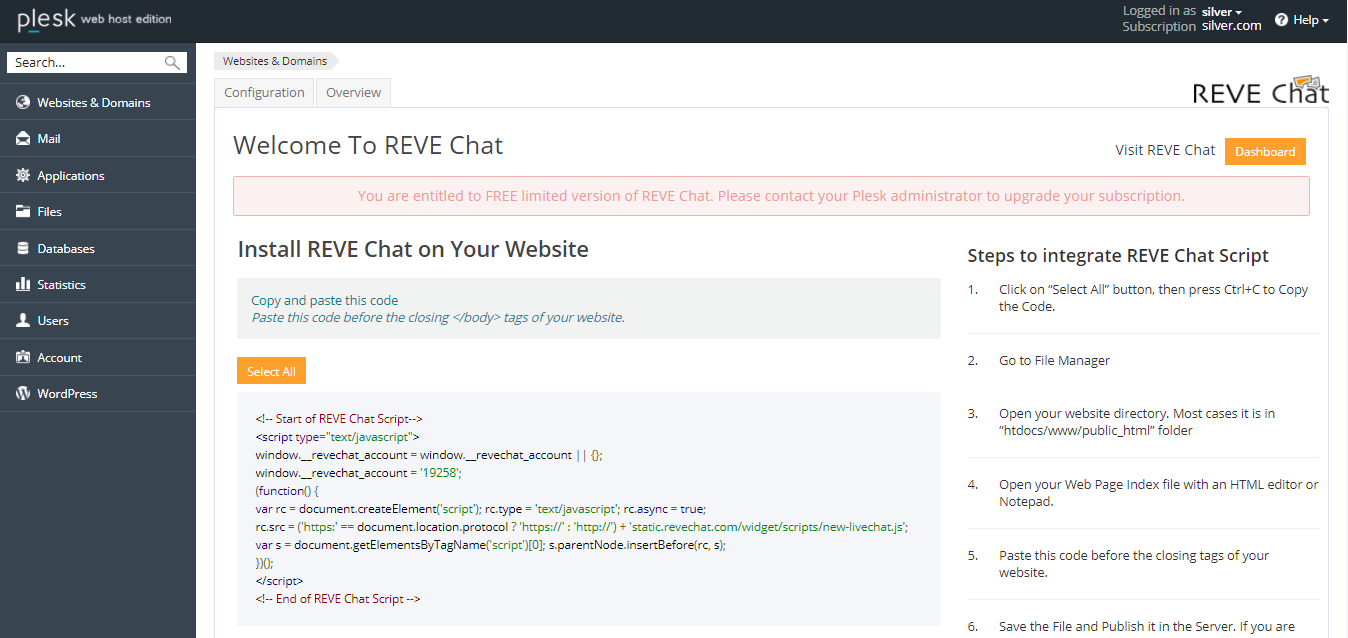
- If the user already has REVE Chat account then the extension will display REVE Chat widget script installation instruction and Extension installation instruction.
- If the user does not have an account, then sign up form will be appeared for sign up.